Category: Recipes

  • Double Chocolate Banana Muffins

    Double Chocolate Banana Muffins

    Indulge in the ultimate chocolatey treat with these moist and flavorful Double Chocolate Banana Muffins.

    Introduction

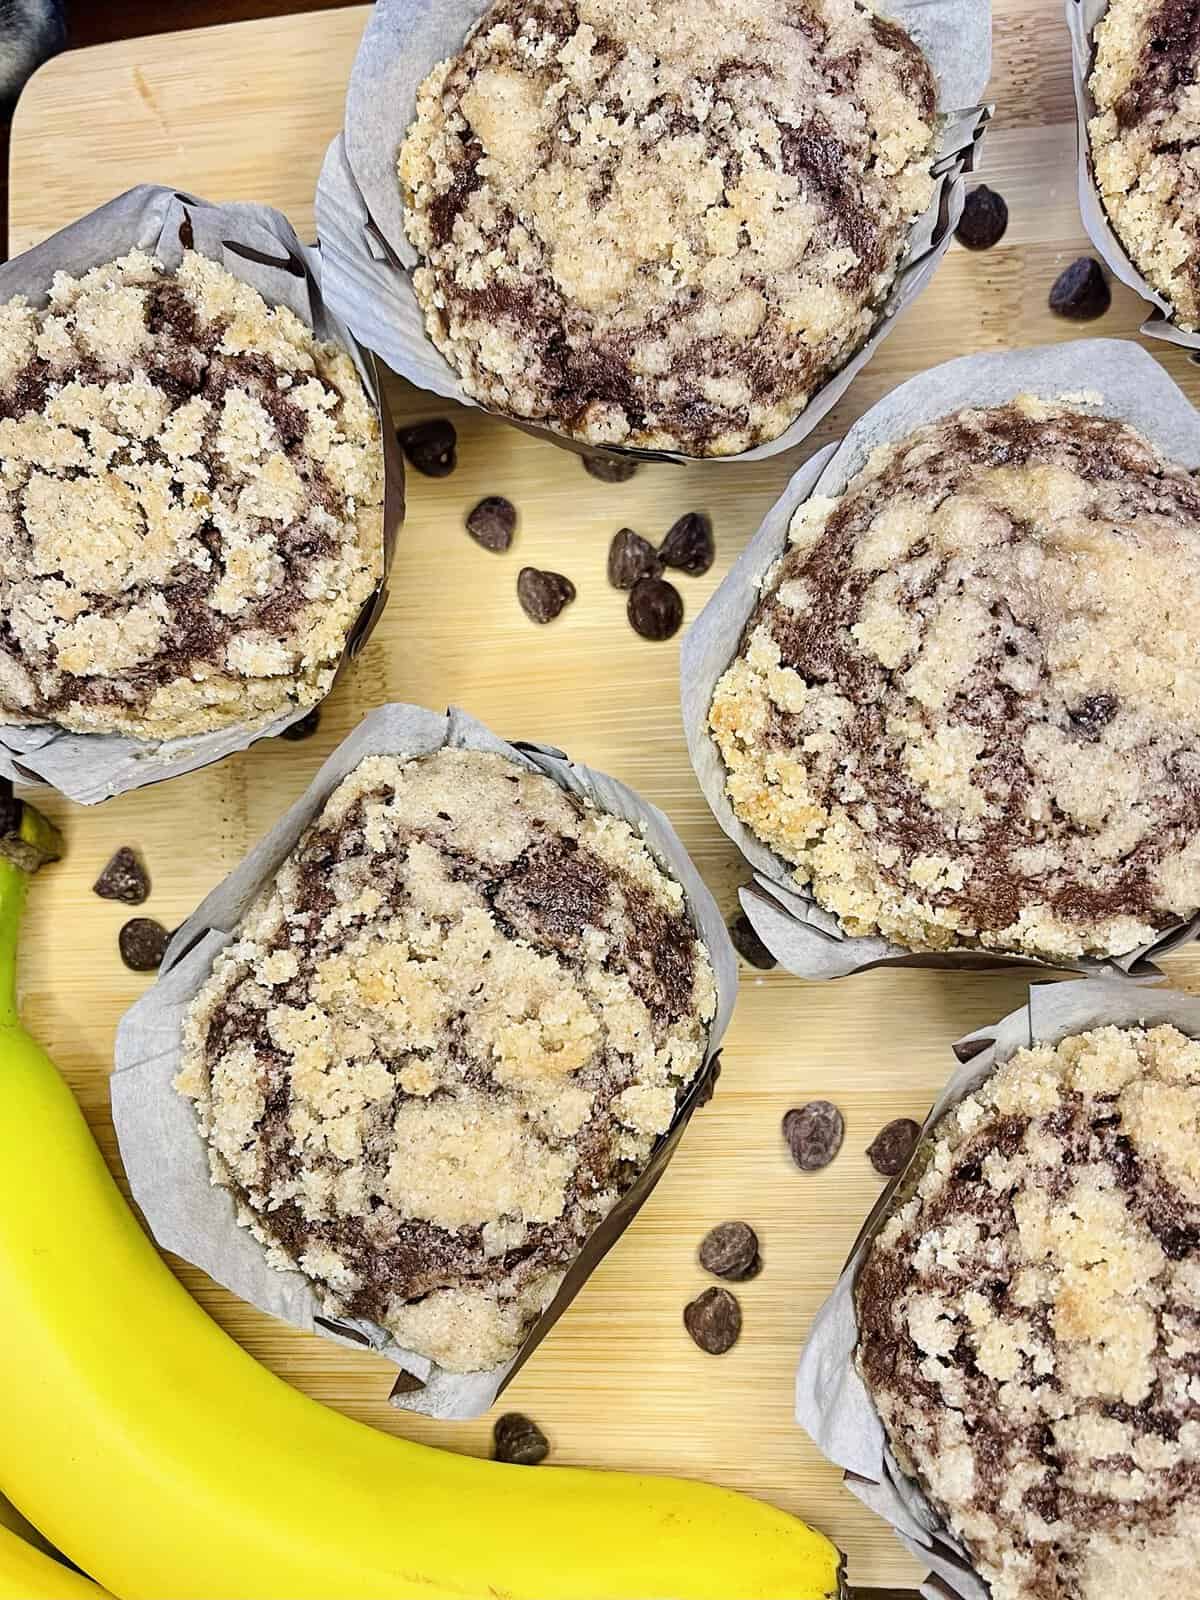
    These double chocolate banana muffins are decadent and moist with a deep chocolate flavor but can be eaten as a breakfast item, making this muffin the best of both worlds. These muffins are topped with a sweet and crunchy streusel topping.

    Those bananas on the counter have got to be used for something, so let’s turn them into a delicious treat!

    Banana Chocolate Chip

    A soon-to-be antique magazine of Taste of Home is where the base of this recipe came from. I made this recipe over a decade ago for the first time and realized this had serious potential.

    After some adjustments, this recipe is more than perfect. My husband, who is not much of a banana bread person, said, “These are emotionally delicious.’

    The description that these double chocolate banana muffins are so good they make you emotional is on point.

    Streusel Topping

    When baked, this streusel topping becomes crisp and sweet, adding a delightful crunch to each bite. This crumbly topping is a delightful contrast of textures and flavors that will have you wanting to lick up the crumbs.

    These double chocolate banana muffins are the type of treats you can make for any occasion. I usually make them in the Fall or for Thanksgiving, but to be honest, bananas start going bad on my counter at any time of the year. Haha.

    Double Chocolate Banana Muffins

    Ingredients for Double Chocolate Banana Muffins

    For the muffins

    • Flour
    • Baking soda
    • Baking powder
    • Salt
    • Cocoa powder
    • Banana
    • Oil (Avocado, Canola, Veggie)
    • Mini Chocolate Chips

    Streusel Topping

    • Sugar
    • Flour
    • Brown Sugar: 1 tbsp
    • Cinnamon
    • Butter (cold)
    Recipe double chocolate banana muffins

    Instructions for Double Chocolate Banana Muffins

    1. Preheat oven to 350 degrees.
    2. Mix your dry muffin ingredients and set aside. Sometimes, I skip the part in recipes (mixing wet and dry ingredients separately), but we are aiming for the best double chocolate banana muffins, and this step does make a difference.
    3. Mash banana with a fork or blend until mostly smooth; this does not have to be perfect, and the tiny bits add texture to the muffins. Add egg and oil.
    4. Mix dry ingredients into wet just until incorporated. Add chocolate chips. Do not overmix.
    5. Time to make the streusel topping: whisk sugar, flour, brown sugar, and cinnamon together. Cut the cold butter into small pieces and cut into the dry mix. (I usually just put a glove on and use my hand to squeeze the butter and mixture together til crumbly and combined.)
    6. Pour batter into greased or lined muffin tins. I highly recommend THESE ONES. They are the perfect size for big, beautiful muffins and are made of parchment paper, so they peel away easily. Pour even amounts, about 3/4th full. For me, this recipe usually makes about 10 large muffins, depending on the size of the bananas.
    7. Top each muffin batter with even amounts of streusel topping. You can push the streusel topping down just a bit so it sticks to the batter while cooking.
    8. Bake for 20 to 22 mins.
    9. Enjoy!
    10. When eating these after they’ve completely cooled or the next day, heat them in the microwave for about 14 seconds so they are absolutely perfect again.
    double chocolate banana muffins

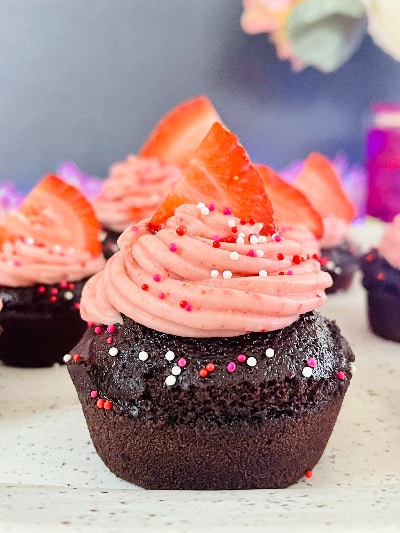
    Looking for other sweet dishes?? Try Homemade Cinnamon Rolls or Chocolate Covered Strawberry Cupcakes

    Storage Tip: These are best kept covered in an air-tight container for up to 4 days.

    When I finally made these muffins this year, I made them for my mother-in-law to take to her bible study and share with the ladies there. Unfortunately, these double chocolate banana muffins were so yummy they never made it to bible study. That’s when you know something is delicious!

    I refer to these muffins as “the best muffins in the world.” I hope you give them a shot and discover the same thing. If you try them, please leave a comment, tag me on Instagram (Cottagefulloflove), or send me a message letting me know how it came out!

    Print

    Double Chocolate Banana Muffins

    If you’re a fan of banana bread and chocolate, you’ll love these double chocolate banana muffins. They’re easy to make, delicious, and perfect for any occasion. Whether you’re looking for a quick breakfast or a sweet treat, these muffins are sure to please.

    • Author: Taylor Fuller

    Ingredients

    Scale

    For the muffins

    • 1 1/2 cups Flour
    • 1 cup sugar
    • 1 tsp Baking soda
    • 1/4 tsp Baking powder
    • 1/2 tsp Salt
    • 1/4 cup Cocoa powder
    • 1 1/3 cup Banana (about 3 mashed bananas)
    • 1/3 cup Oil (Avocado, Canola, Veggie)
    • 1 large Egg
    • 1 cup Mini Chocolate Chips

    Streusel Topping

    • 1/2 cup Sugar
    • 1/3 cup Flour
    • 1 tbsp Brown Sugar
    • 1/2 tsp Cinnamon
    • 1/4 cup Butter (cold)

    Instructions

    1. Preheat oven to 350 degrees.
    2. Mix your dry muffin ingredients and set aside.
    3. Mash banana with a fork or blend until mostly smooth; this does not have to be perfect, and the tiny bits add texture to the muffins. Add egg and oil.
    4. Mix dry ingredients into wet just until incorporated. Add chocolate chips. Do not overmix.
    5. Time to make the streusel topping: whisk sugar, flour, brown sugar, and cinnamon together. Cut the cold butter into small pieces and cut into the dry mix. (I usually just put a glove on and use my hand to squeeze the butter and mixture together til crumbly and combined.)
    6. Pour batter into greased or lined muffin tins. Pour even amounts, about 3/4th full. For me, this recipe usually makes about 10 large muffins, depending on the size of the bananas.
    7. Top each muffin batter with even amounts of streusel topping. You can push the streusel topping down just a bit so it sticks to the batter while cooking.
    8. Bake for 20 to 22 mins.
    9. Enjoy!
    10. When eating these after they’ve completely cooled or the next day, heat them in the microwave for about 14 seconds so they are absolutely perfect again.

    Did you make this recipe?

    Share a photo and tag us — we can’t wait to see what you’ve made!

  • Carrot Cake Bites

    Carrot Cake Bites

    Satisfy your sweet tooth with bite-sized carrot cake bliss! This recipe shows you how to make easy, delicious carrot cake bites packed with flavor. Perfect for parties, potlucks, or a quick and easy dessert.

    Happy Easter Everyone!!

    I am so late to the party making these. I have seen everyone posting their Easter recipes and desserts months ago! But, nonetheless, here I am, getting this up.

    These bites are exactly what you want from carrot cake. They are mild and tame in flavor, so no one can resist reaching for another! This is just a cake cut into small, 2-bite pieces. This makes them so cute and dainty. There is just something about small bite-sized desserts that makes them so much more tasty. Also, the cream cheese frosting on top is incredibly perfect; it balances out the mild flavor of the carrot cake.

    Carrot cake

    Why Carrot Cake?

    Carrot cake has a long history, starting as a carrot pudding in 1591; that honestly doesn’t sound too appetizing, but that’s before we had convenient access to all the goodies we do now. Carrot cake then became popular when sugar was rationed, and people were looking for a sweet treat. Throughout the years, it has evolved into the delicious, moist, spiced cake we all know and love today.

    While carrot cake is not exclusive to Easter, it seems to go hand in hand in my head. If the Easter bunny could pick a cake, I’m sure he’d choose carrot cake every time. These carrot cake bites are perfect for Easter dinner, an Easter tea party, or a Springtime dessert.

    Carrot Cake ingredients

    About These Carrot Cake Bites

    These carrot cake bites are so moist and spongy. They are somehow even better the next day.

    Applesauce: The applesauce makes these so moist and has some extra flavor.

    Cinnamon: This gives the cake that little spice that is craved when eating carrot cake. I skipped the ginger because I enjoy the mild flavor of the cake. If you miss it, though, add a little. If you love cinnamon the way I do, check out these Homemade Cinnamon Rolls!

    Grated Carrots: You must grate your own carrots. I know they sell pre-grated carrots at the store, and while those are great for a salad, they won’t meld with the cake the same. Get out that grater and DIY those carrots!

    Frosting: While you can get away with softening the butter in the microwave and using cold cream cheese, I HIGHLY suggest planning ahead and letting these things soften naturally to room temp first. The creaminess is unmatched!

    Easter Carrot Cake

    Fun Toppings

    I LOVE these little carrot designs on each piece, and when I tell you I am NOT an artist, I mean it. These were so easy! Just a squiggle and then a little green on top. They all have so much personality! Here are the types of icings I used:

    Amazon Icing
    Common Betty Crocker, great stuff.
    Wiltons icing
    This stuff is worth the money! It’s so great and stores well!

    If you aren’t feeling that creative though, feel free to use sprinkles or even just leave it blank! Decorate for someone’s birthday with birthday sprinkles or colored frosting.

    Here are a couple of my favorite Amazon sprinkle options:

    Easter Sprinkles
    Sprinkles by Manvscake
    Easter Sprinkles 2
    Easter Spinkles by Sweets Indeed

    Let’s get to baking!

    Print

    Carrot Cake Bites

    These carrot cake bites are mildly spiced with cinnamon and are perfect for parties, potlucks, or a quick and easy dessert for Easter, Springtime, or any time of the year!

    • Author: Taylor Fuller

    Ingredients

    Scale

    Cake Ingredients

    • 1 1/2 cups Applesauce
    • 2 cups Granulated Sugar
    • 3 Eggs
    • 2 cups All-purpose Flour
    • 1 teaspoon Baking Soda
    • 1 1/2 teaspoon Baking Powder
    • 1/2 teaspoon Salt
    • 1 1/2 teaspoon Cinnamon
    • 2 cups Grated Carrots (about 3 large carrots grated)

    Frosting

    • 1/2 cup Softened Butter
    • 8 oz Softened Cream Cheese (1 block)
    • 3 1/2 cups Powdered Sugar
    • Decorating icing or sprinkles

    Instructions

    1. Preheat oven to 350 degrees F. Line a jelly roll pan (12×17) with parchment paper and lightly spray with non-stick spray. (Can replace with a 9×13 pan, but your bites will be much thicker, so increase cook time. If replacing for cupcakes, also adjust the cook time.)
    2. Beat applesauce, sugar, and eggs until smooth.
    3. Add flour, baking soda, baking powder, salt, and cinnamon. (Technically, this should be mixed separately and then added, but I don’t like doing extra dishes, sooooo do as you wish.) Beat until smooth.
    4. Fold in carrots.
    5. Spread batter into prepared pan and bake for 24-28 mins til toothpick comes out clean. Cool completely before frosting.
    6. Frosting: Beat butter and cream cheese until creamy and fluffy. Add powdered sugar in increments until it is all smooth and delicious.
    7. Remove cake from pan by parchment and frost. I suggest keeping the cake on parchment until serving for easy removal of pieces on parchment.
    8. Enjoy!

    Did you make this recipe?

    Share a photo and tag us — we can’t wait to see what you’ve made!

  • Chocolate Covered Strawberry Cupcakes

    Chocolate Covered Strawberry Cupcakes

    Get ready to tantalize your taste buds with a delightful treat that combines two classic favorites: rich, moist chocolate cupcakes and fresh strawberries sitting in a homemade strawberry cream cheese frosting. This recipe will be your guide to creating these irresistible chocolate covered strawberry cupcakes, perfect for any occasion, from Valentine’s Day to birthday celebrations or simply a sweet indulgence.

    The inspiration for these incredible little buggers came from the chocolate-covered strawberries my husband and I have been addicted to lately! While these are basically STRAWBERRY covered chocolate cupcakes, that doesn’t sound as fun haha!

    A few weeks ago, I made these Brownies for Valentine’s Day that were so perfect for packing up and taking to work, school, bible study, or any other gathering for Valentine’s Day.

    Brownies for Valentine’s Day

    What we love about these cupcakes

    Do not be intimidated by the amount of ingredients! It’s not as bad as it looks and if you really wanna cut down on the amount of shopping, go ahead and buy a chocolate boxed cake mix or some canned strawberry frosting but I am telling you, this recipe is worth the effort. You will have guests so impressed with the complex flavor of these chocolate covered strawberry cupcakes.

    I wanna be totally honest; this was the first recipe where I blended freeze-dried fruit to a powder to add for color and flavor. I am genuinely impressed by how amazing it worked. While I am in love with colored frosting, I am not in love with using food dye for everything.

    Making these Chocolate Covered Strawberry Cupcakes

    The Cake

    This cupcake recipe is a take-off of Ina Garten’s Chocolate Cake Recipe. It does not even compare to the boxed stuff. There was a time where I preached that homemade was just as good as boxed. Boy was I wrong. This recipe is next level.

    Coffee in the batter. It gives the cupcake this rich, deep, dark flavor. The flavor is unbeatable!

    There is 1/2 heavy cream and 1/2 milk in this chocolate covered strawberry cupcakes recipe but if you choose to replace that with half and half or buttermilk or even just all whole milk your recipe should be just fine!

    Frosting

    I’m a sucker for cream cheese frosting. While buttercream frosting would probably go just as well, the cream cheese frosting adds to the depth of flavor.

    Real strawberries! So I had seen the trend going around of using real freeze-dried fruit, turning it into a powder, and using it in recipes. Go figure, it works AMAZING! The joy I feel, being able to color and add flavor to my frosting without adding dyes or synthetic flavors, makes me so happy. Trader Joe’s sells the perfect sized bags of freeze-dried fruit and for SUCH a reasonable cost! If you’d prefer to Amazon it, here is a great brand to the sized bag in this recipe.

    More recipes with freeze-dried fruit powder to come!

    Toppings

    Pink, red, or white sprinkles are perfect for topping for these chocolate covered strawberry cupcakes! Here are the kind I used but feel free to get creative with fun sprinkles!

    Fresh strawberries add a freshness to these cupcakes that set them apart from others. Just add them before setting them out. If making these many hours before a party, try to add them more last minute so the strawberries are as fresh as possible.

    Double Chocolate Banana Muffins

    Indulge in the ultimate chocolatey treat with these moist and flavorful Double Chocolate Banana…

    Carrot Cake Bites

    Satisfy your sweet tooth with bite-sized carrot cake bliss! This recipe shows you how to make easy…

    Chocolate Covered Strawberry Cupcakes

    Get ready to tantalize your taste buds with a delightful treat that combines two classic favorites:…

    10 Goals for a Happier Life

    Happy is what we are all striving for, right? Whether that means money, family, less stress, getting…

    Brownies for Valentine’s Day

    These aren’t your average boxed brownies for Valentine’s Day. We’re transforming a…

    Best 12 Interactive Cat Toys for Bored Cats

    Bored kitties? No more! Dive into our purr-fectly curated list of the best interactive cat toys to…
    Print

    Chocolate Covered Strawberry Cupcakes

    These cupcakes are special! The cupcake part of these is moist and rich in flavor, unlike any boxed mix on the market. The frosting is creamy and fruity with real strawberries. Complex flavors make this cupcake different and unique, similar to a chocolate-covered strawberry.

    • Author: Taylor Fuller

    Ingredients

    Scale

    Cupcakes

    Dry Ingredients

    2 cups all-purpose flour

    2 cups granulated sugar

    3/4th cup cocoa powder (special dark is the best)

    2 tsp baking soda

    1 tsp baking powder

    1 tsp salt

    Wet Ingredients

    1/2 cup heavy cream

    1/2 milk

    1/2 cup vegetable oil

    2 large eggs

    1 tsp vanilla extract

    1 cup hot coffee

    Frosting

    8 oz cream cheese, softened

    1/2 cup salted butter, softened

    4 cups powdered sugar

    1 tsp vanilla extract

    1.2 oz bag of freeze-dried strawberries (such as this bag from Amazon or Trader Joe’s carries them also)

    Toppings

    Spinkles

    Fresh strawberries, sliced for topping

    Instructions

    1. Preheat oven to 350 degrees.
    2. Spray cupcake pan with non-stick spray or line with cupcake liners.
    3. Whisk all the dry ingredients together in a large bowl.
    4. In a separate bowl, whisk together all the wet ingredients EXCEPT the coffee.
    5. Slowly add wet ingredients to dry ingredients. Once incorporated, add a cup of hot coffee and mix everything until there are no pockets of dry flour left. The batter will be very thin.
    6. Pour batter into cupcake pan until evenly distributed.
    7. Bake for 20 mins for regular muffins, 15 mins for mini-muffins. Check that a toothpick comes out clean before removing.
    8. For the freeze-dried strawberries: Blend strawberries in a blender until fine powder forms.
    9. Once the cupcakes are cool, whip the frosting ingredients until smooth and light.
    10. Spoon frosting into piping bag with tip; such as with this set.
    11. Shake sprinkles on while frosting is still wet but save sliced strawberries for right before serving as they will get wilty after about 4 hours.
    12. Enjoy!

    Did you make this recipe?

    Share a photo and tag us — we can’t wait to see what you’ve made!

  • Loaded Baked Potato Soup Dutch Oven

    Loaded Baked Potato Soup Dutch Oven

    Simple ingredients, big flavor: This loaded baked potato soup Dutch oven recipe is made with pantry staples like potatoes, cheese, bacon, and milk. But don’t let the simplicity fool you – it’s packed with flavor!

    This Winter has been so chilly! The benefit of that, though, is SOUP! I’ve been focusing on homemade soups this year, and this one is definitely a winner. The bacon and extra cheese on top are really the cherries on top, but to be honest, I ate most of it without the toppings. I really enjoyed the creamy, comforting flavors of this super easy, loaded baked potato soup Dutch oven recipe!

    Loaded Baked potato soup dutch oven

    This is another one of my Dutch Oven meals. I have raved about the Dutch Oven so much in previous posts, but let us talk about it again cause it’s just one of my favorite kitchen appliances.

    What is a Dutch Oven?

    • The Dutch oven was inspired by brass and copper pots made and used in China more than 2,500 years ago. In the 17th century, a man named Abraham Darby returned home to the Netherlands and patented his design for the “Dutch Oven”
    • In 1891, the beautiful, eye-catching enamel coating was added to the oven, and sales quickly spread through Europe.
    • Due to its thick walls, Dutch ovens retain heat better than normal pots and work great inside the oven, on the stovetop, or even over a campfire.
    • The options for cooking with this small appliance are endless. It cooks meat better than any slow cooker ever could, bakes perfectly crispy bread, is perfect for frying, and makes perfect soup.

    Want to check out another Dutch Oven soup recipe? Check out this Minestrone Soup!

    Why use Dutch Oven for this Loaded Baked Potato Soup?

    The Dutch Oven is great. It retains heat beautifully and makes things just taste better. It distributes heat so evenly to the whole surface area of the oven.

    You can use the Dutch Oven in the oven to cook bread or meat. It can also be used on the stovetop like an incredible pot for soups and pasta dishes! It is perfect for this loaded baked potato soup Dutch oven recipe!

    Dutch Oven

    Are you looking for the most amazing gift for the cook in your life? Open a whole new door to cooking and buy them this quality beauty!

    Making this Loaded Baked Potato Soup Dutch Oven Recipe

    This recipe has some prep:

    Onions and Potatoes
    • Chop the bacon into bite-sized pieces.
    • Dice the onion small.
    • Mince the garlic.
    • Cut the potatoes into little cubes.
    • And if you’re using fresh, which of course, I recommend, shred the cheese

    When I tell you this loaded baked potato soup Dutch oven recipe is worth the prep, it is! It is so creamy and comforting.

    Loaded baked potato soup with bread

    Once the prep is done, the recipe gets easy, and all goes into one pot!

    1. Placing the bacon in the bottom of a cold Dutch Oven allows the fat to render and break down. This will lead to a crispier, less fatty bacon. Place the cooked bacon on a paper towel and set aside but save about 2 tbsps of bacon grease in the pan. If the amount of oil at the bottom is WAY more than a couple of tablespoons, remove some.
    2. Add your onions to the hot pan. Saute your onions til they are translucent and browning. Make sure to scrape all those goodies from the bottom of the pan.
    3. Now it’s time to add your flour! Use a whisk to smooth out the flour, and blend with the onions for about a minute.
    4. Turn down the heat and add garlic for a minute til fragrant.
    5. Add chicken broth, milk, cream, and potatoes. Make sure to heat this up slowly so as not to allow the dairy to separate. Start on low and increase to medium heat, making sure to stir often!
    6. Cover and boil for at least 25 mins. This is my favorite time to clean up the kitchen, get all the dishes washed and put away so when your soup is done there won’t be a sink full of dishes! Additionally, this soup goes GREAT with French bread from the store (Tip: Heat the French bread at 350 degrees for 5-7 mins for the BEST warm, store-bought French bread.)
    7. Fork the potatoes after 25 mins; if not tender, allow to cook til soft. Once soft, use a potato masher right in the Dutch Oven til creamy and most of the potatoes are mashed or the desired consistency. At first, I thought this would be amazing if totally smooth, but once I tried it with some potato pieces still in it, I realized it was perfect.
    8. Add your 1/2 cup shredded cheese. If you have been following me for awhile, you know what I’m gonna say…please use fresh! Freshly shredded cheese is just SO MUCH BETTER than pre-shredded.
    9. Add your salt and pepper. I like to add a good amount of salt and some good quality pepper; it adds so much flavor.
    10. Time to dish it up! I’m missing chives and sour cream in my photos, but don’t let that stop you. The bacon, fresh cheese, add parmesan, chives, and sun-dried tomatoes, and the possibilities really are endless. Whatever you enjoy on a baked potato would go great on this soup!
    11. Enjoy this loaded baked potato soup Dutch Oven recipe!
    Loaded baked potato soup dutch oven
    Print

    Loaded Baked Potato Soup – Dutch Oven

    Skip the takeout and whip up a cozy bowl of Loaded Baked Potato Soup in your Dutch oven! Our hearty recipe is packed with tender potatoes, melty cheese, and crispy bacon. It’s the perfect comfort food fix for a chilly day.

    • Author: Taylor Fuller

    Ingredients

    Scale

    1 cup diced Bacon

    1/2 cup diced Onion

    1/4 cup Flour

    2 cups Heavy Cream

    2 cups Milk

    1 clove chopped Garlic

    4 cups Chicken Broth

    4 large Russet Potatoes

    Salt & Pepper to Taste

    1/2 shredded Cheddar Cheese

    Instructions

    1. Layer uncooked bacon in bottom of cold dutch oven then turn on stove to medium and cook bacon until crispy. Remove bacon and leave grease.
    2. Saute onions in bacon grease til soft and translucent. (If not cooking bacon just add 2 tbsp of cooking oil to pan before adding onions.)
    3. Add flour, whisk til smooth and cook for about 1 minute
    4. Turn down heat and add milk, cream, garlic, chicken broth and potatoes. Slowly bring to a boil.
    5. Once boiling, continue to boil for 25 mins, stiring frequently.
    6. Once potatoes are soft, mash with a potato masher until desired consistency.
    7. Add the 1/2 cup of shredded cheddar cheese.
    8. Add salt and pepper to taste (about 1tsp of salt & 1/2 tsp of pepper)
    9. Laddle into bowl, top with bacon, additional cheese, sour cream, chives, the possibilities are endless!
    10. Enjoy!

    Did you make this recipe?

    Share a photo and tag us — we can’t wait to see what you’ve made!

  • Brownies for Valentine’s Day

    Brownies for Valentine’s Day

    These aren’t your average boxed brownies for Valentine’s Day. We’re transforming a simple mix into a dessert that’s as delicious as it is adorable.

    It’s almost Valentine’s Day! After the holidays, I find it hard to get into the rhythm of decorating and festivities again. I know many people do not decorate or do anything too special but I am an advocate of making things fun and special. Making these brownies for Valentine’s Day for the kids, family, to gift to neighbors or coworkers is such a sweet gesture.

    Brownies for Valentine's Day

    Need more dessert ideas? How about Homemade Cinnamon Rolls that will knock your socks off!

    Ingredients

    Valentine's ingredients

    13 x 9 Baking Dish- Cuisinart dish

    Mixing Bowl – Fox Run mixing bowl

    Heart-Shaped Cookie Cutter – Perfect sized cutter

    Melting Chocolates – Dolci melting chocolates

    Valentine’s Day Sprinkles – Sweets sprinkles

    Brownie Mix – Duncan Hines family size

    How to Make Brownies for Valentine’s Day

    This recipe is easy and fun!

    Bake the brownies just as directed on the package. The only tips I have for this is to use a 13×9 dish to get the most surface area out of your brownies (so you can make the most treats) and use the Duncan Hines brand because it is THE BEST, but any brand will work.

    Also, put parchment down and give it a light spray of oil so you can get your whole tray of brownies out and it makes for easier lifting. The last thing you want is your brownies sticking to the pan and being unable to get your heart shapes out. (I save scraps for the chef haha)

    Brownies cut out

    Once your brownies are cut out and set aside, it’s time to melt your chocolate. Melt the wafers per the microwave directions or over a double boil. Preferably the chocolate should be in a wide but shallow bow so you can dip the front of your heats into the chocolate. I like to keep a spoon handy to help spread the chocolate a little bit.

    Brownies for Valentine's Day

    At this point, make sure to have your sprinkles nearby. While the chocolate is still wet pour your sprinkles over the top and leave to dry. I coat then sprinkle about 3 brownies at a time.

    When all your brownies are beautiful, make sure to let them set for a bit. Maybe an hour on a cool day. The chocolate will harden, and they become extra great!

    Presentation

    Heat Sealer

    Lastly, I wanna talk about bringing this dessert from amazing to being sell-ready. This heat sealer is incredible. Even when I just make these brownies for ourselves I love to package them up because it makes them feel professional.

    Package Brownies for Valentine's Day

    The last time I brought these brownies for Valentine’s Day to a family gathering and was asked if I was selling them. It was such a compliment! I can’t recommend this device enough. It can be used year-round for treats and snacks! And don’t forget baggies for it!

    Brownies for Valentine's Day

    Do not forget to pick up a pack of strawberries while you are at the store so you can make up some chocolate strawberries with the leftover melting chocolate!

    Do you love the seasons and holidays like I do? Check out some of these fun posts!

    New Year Resolution Ideas for Couples

    Mother’s Day Ideas

    Best Summer Kitchen Products! 2023

    Autumn Decor Trends of 2023

    Print

    Brownies for Valentine’s Day

    These aren’t your average boxed brownies. We’re taking a simple mix and transforming it into a dessert that’s as delicious as it is adorable.

    • Author: Taylor Fuller
    • Yield: About 8 brownies (smaller cutters will yield more) 1x
    • Category: Desserts
    • Method: Baking

    Ingredients

    Scale

    1 Box of Family Size Duncan Hines Chewy Fudge Brownie Mix

    2 Large Eggs

    2/3 cup Oil

    16 oz Melting Chocolate Wafers

    Fun Pink & Red Sprinkles

    Supplies Needed:

    • 13×9 dish
    • Parchment paper
    • Heart-shaped cookie-cutter
    • Bowl for batter
    • Whisk
    • Bowl for Melting Chocolate

    Instructions

    1. Preheat 350 degrees.
    2. Make brownie batter as directed and pour it into a 13×9 dish lined with parchment paper.
    3. Bake as directed til the toothpick inserted comes out clean.
    4. Let cool for a bit (at least 10 mins)
    5. Lay out brownies on a cutting board or clean countertop.
    6. Cut brownies with cookie-cutter, getting as much out of your sheet of brownies as possible.
    7. Heat up chocolate wafers as directed and place melted chocolate in a dish large enough to dip the front 1/2 of the brownie in.
    8. Sprinkle with sprinkles while the chocolate is still melted.
    9. Let cool until set.
    10. Enjoy!

    Notes

    If planning on packaging these up, let them set for at least a couple of hours.

    Did you make this recipe?

    Share a photo and tag us — we can’t wait to see what you’ve made!

  • Spinach and Mushroom Noodles with Chicken

    Spinach and Mushroom Noodles with Chicken

    Succulent chicken, sauteed mushrooms, and fresh spinach dance in a rich parmesan cream sauce over fluffy noodles. This Spinach and Mushroom Noodles with Chicken recipe is weeknight dinner magic!

    This recipe takes a little prep since it’s cooking chicken, cutting an onion and mushrooms but it is so worth it! The flavors are fresh and light and this makes a great family meal.

    If you are making a fancy dinner, this Minestrone Soup would be a great appetizer with this Italian-inspired dish!

    spinach and mushroom noodles with chicken

    Ingredients

    • Cooking oil, I use avocado oil but Olive oil or Canola oil if that’s your thang.
    • Chicken breast is my preference for this recipe, but feel free to switch it with chicken thighs or even pork chops would go well with this recipe.
    • I’m leaving the seasoning of the chicken up to you! Whatever you normally use in your pantry, just toss it on. If you are unsure just use a little salt, pepper, Italian seasoning, garlic, and/or onion powder.
    • Pasta! The Farfalle pasta is perfect for this recipe, but fusillini, penne, get creative, or just use whatever you have an extra package of.
    • Chop up the onions into thin slivers so they cook up into almost strips, they blend into the pasta well like that.
    • Balsamic Vinaigrette, this little splash and pinch of salt at the end of the cooked onions is incredible!
    • Crimini mushrooms sliced kind of thick is what I use but feel free to use more exciting options.
    • A good handful of fresh spinach adds so much brightness and greens!
    • If you don’t have heavy cream just use half-and-half
    • Fresh Parmesan cheese is a must!
    spinach and mushroom noodles

    Cooking the Spinach and Mushroom Noodles with Chicken

    1. Starting the noodles first and then just setting them aside helps from having too much going on at once.
    2. Slice your chicken breasts or pound them down to about 1/4 inch thick.
    3. While your chicken is laid out, season your chicken and coat.
    4. I’m a sucker for a non-stick pan and I still like to add a couple tbsps of oil. Once your oil is hot add your chicken. Try not to flip your chicken breasts til you see it starting to cook on the sides and the edges are turning white.
    5. Once your chicken is cooked and beautiful, set it on a plate and loosely cover with aluminum foil to keep it juicey and warm.
    6. Add your onions to your warm pan and add a couple tbsps of water to deglaze the pan. Low and slow is very important for perfectly caramelized onions.
    7. Once the onions are finally done, add the splash of balsamic vinaigrette and a pinch of salt. Make sure to take some good sniffs of the depths of scents at this point. Then move them into a dish to free up your pan.
    8. Add your garlic and mushrooms. Your house will smell amazing at this point! Cook them for about 2 mins just to let the garlic become fragrant and your mushrooms to brown a little bit.
    9. Time to add your spinach and let wilt for about 20 seconds.
    10. Make sure to turn down the temp at this point because the last thing you want is to overheat your heavy cream and cheese and cause the lactose to separate and make your dish grainy.
    11. Once your pan has cooled down to a low setting, add your cream and cheese, add a little salt and pepper to taste.
    12. Let the cheese melt and add your noodles and onions and stir til all well incorporated.
    13. I like to place this mixture at the bottom of a pasta dish and top with freshly chopped chicken.
    14. Perfection! Enjoy!
    spinach and mushroom noodles with chicken

    Need other dinner inspiration? Here are some of my favorites!

    Chile Relleno Souffle

    Easy Pesto Lasagna

    Easy Chicken Enchiladas – 6 Ingredients

    Print

    Spinach and Mushroom Noodles with Chicken

    Whip up this restaurant-worthy Spinach and Mushroom Noodles with Chicken in under 30 minutes. Juicy chicken, savory mushrooms, and wilted spinach in a velvety parmesan sauce – a family favorite reborn!

    • Author: Taylor Fuller
    • Prep Time: 15 mins
    • Cook Time: 35 mins
    • Total Time: 50 minutes
    • Yield: About 4 full meal servings 1x
    • Category: Family Dinners
    • Method: Stove Top
    • Cuisine: Italian

    Ingredients

    Scale

    Chicken

    • 2 tbsp cooking oil
    • 2 Chicken breasts, thinly sliced or pounded
    • Preferred seasonings for chicken (salt, pepper, onion, garlic, Italian seasoning)

    Pasta

    • 8 oz of Farfalle pasta, 1/2 a box (or pasta of choice)

    Sauce

    • 1/2 Onion chopped in slivers
    • 1 tbsp Balsamic Vinaigrette
    • 4 oz Mushrooms, Sliced
    • 1 cup Spinach, roughly chopped
    • 2 cloves of Garlic, Minced
    • 1/2 cup Heavy Cream
    • 3/4th cup Parmesan Cheese, preferably freshly grated
    • Salt & Pepper

    Instructions

    1. Boil pasta til done, drain, and set aside.
    2. Coat chicken lightly with salt, pepper, Italian seasoning, garlic, and/or onion powder.
    3. Heat oil on medium/large skillet.
    4. Cook chicken breasts on both sides til golden brown, beautiful, and fully cooked (165 degrees). Set aside.
    5. In the same pan, you cooked chicken (no need to wash it), add onions, and a couple of tbsps of water. Cook on medium/low til onions smell sweet and caramelized.
    6. As far as cooking the onions go..the art of caramelization takes patience. If they dry out, add a couple more tablespoons of water. They will start to turn golden and smell amazing. This process can take 20 mins if you have the time to let it.
    7. Once onions have caramelized to tender perfection, add a splash of balsamic vinaigrette and a pinch of salt just til incorporated, remove, and set aside.
    8. In the same pan, toss in your garlic and mushrooms. Cook for about 2 mins, then add spinach.
    9. Turn the heat down to the lowest setting and add heavy cream and parmesan cheese.
    10. Add noodles and caramelized onions.
    11. Cut chicken breast into pieces and serve on top of a serving of noodle mixture.
    12. Enjoy!

    Notes

    Make sure to take a minute to enjoy the smell of those onions after the glazing of balsamic vinegarette and salt. The flavors and scents are so intricate; it’s lovely.

    I like to keep the chicken and noodles separate so I can save the leftover chicken for other recipes.

    Did you make this recipe?

    Share a photo and tag us — we can’t wait to see what you’ve made!

  • Dutch Oven Minestrone Soup

    Dutch Oven Minestrone Soup

    No fancy skills are required, just a love for good food and a Dutch oven ready for action.

    This Dutch oven minestrone soup is a symphony of simmered goodness, ready to warm your heart and fill your belly. Ditch the multiple pots and pans – let your trusty Dutch oven work its magic, transforming fresh vegetables, plump beans, and tender pasta into a cozy masterpiece.

    In the cold weather of the New Year it’s important to get lots of sunlight and eat lots of warm soup!

    This soup, while vegetarian, is filling and can be a whole meal. Add some fresh-baked bread, top with some grated parmesan cheese, or use this soup as a fancy appetizer for a dinner party. I love minestrone by itself as a whole meal, and the last time I made this, my husband and I ate our weight in soup with some fresh French bread! Yum!

    Soup

    Dutch Oven Magic

    The Dutch oven has been my best friend since I received it as a gift from my aunt and uncle. It’s the most amazing kitchen tool.

    Dutch oven

    Here is the link to the Dutch oven I have that I make this recipe in regularly!

    • The Dutch oven was inspired by brass and copper pots made and used in China more than 2,500 years ago. In the 17th century, a man named Abraham Darby returned home to the Netherlands and patented his design for the “Dutch Oven”
    • In 1891, the beautiful, eye-catching enamel coating was added to the oven, and sales quickly spread through Europe.
    • Due to its thick walls, Dutch ovens retain heat better than normal pots and work great inside the oven, on the stovetop or even over a campfire.
    • The options for cooking with this small appliance are endless. It cooks meat better than any slow cooker ever could, bakes perfectly crispy bread, is perfect for frying, and makes perfect soup.
    soup

    Minestrone Soup

    • Minestrone is an ancient soup that dates back to 30 CE in Rome
    • The soup used to be known as a poor man’s soup, as it doesn’t include any of that expensive ol’ meat.
    • There were times when minestrone contained everything from turnips and lard to wine and even animal brains.
    • Versatility is the beautiful thing about this recipe; feel free to add or replace veggies with…
      • Fava beans
      • Broad beans
      • Mushrooms
      • Asparagus
      • Lentils
      • Cabbage
      • Kale
    • Feel free to add protein! Some shredded roasted chicken, cubed cooked steak, or even shredded pork would be delicious in this soup!
    • The possibilities are endless!
    Minestrone soup ingredients

    Grocery List

    For this Dutch Oven Minestrone Soup, the ingredient list is probably mostly things you have in the house. The only things I had to pick up were the tomatoes and fancy little noodles

    • Vegetable broth, or chicken, if that’s what you have
    • Kidney Beans, just 1 regular-sized can
    • Onion, I use just 1/2 of one
    • Carrots, about 3-4 large
    • Celery, 4-5 stalks
    • Garlic, 3 cloves
    • Diced canned tomatoes
    • Italian seasoning
    • Ditalini pasta
    • Spinach, fresh, just a handful with a rough chop
    • Cooking oil
    • Salt & Pepper
    minestrone soup steps

    Cooking the Dutch Oven Minestrone Soup

    1. Dice all your veggies first! I’m the worst about this, I’ll be rushing to dice veggies while already sauteing my onions. Don’t be me, haha! Dice your veggies small, as these will be the size they will be when your soup is done.
    2. After heating your Dutch oven on medium heat, add your olive oil and then your diced onions.
    3. I like to add my carrots before my onions are translucent; the little browning on the carrots adds great flavor. Then, after a min or two, add your celery and garlic. Let that heat through and cook for a few minutes, maybe about 3 mins.
    4. Now you can add your 6 cups of broth, the whole, undrained can of tomatoes, the washed kidney beans, and Italian seasoning. Add a little pepper. I skip the salt here cause the broth is salty enough. Just check it at the end to make sure your soup is flavorful enough, or add a little salt then. Let this simmer for about 10 mins.
    5. Add your dry pasta and let simmer for 10 mins til pasta is al dente. Feel free to change up the pasta type in this step!
    6. A handful of fresh, rough, chopped spinach adds the perfect green and just a little extra nutrition!
    7. This soup is one of my favorites, and I hope you enjoy it just as much!

    If you make this Dutch Oven Minestrone Soup, please leave a comment and tell me how you enjoyed it!

    Print

    Dutch Oven Minestrone Soup

    Soup season is here! And what better way to celebrate than with a pot of homemade minestrone? This Dutch oven version is simple to make yet bursting with flavor. Serve it with crusty bread for a satisfying meal.

    • Author: Taylor Fuller
    • Prep Time: 20 mins
    • Cook Time: 30 mins
    • Total Time: 50 minutes
    • Yield: About 4 full meal servings 1x
    • Category: Family Dinners
    • Method: Dutch Oven
    • Cuisine: Italian
    • Diet: Gluten Free

    Ingredients

    Scale

    2 tbsp Olive or Avocado oil

    1/2 cup Onion, diced

    1 cup Carrot, diced

    1 cup Celery, diced

    3 cloves of garlic, minced

    15 oz Red Kidney Beans

    68 cups Vegetable Broth (or Chicken Broth)

    28 oz Can of Petite Diced Tomatoes, with juices

    1 1/2 tsp Italian Seasoning

    1 cup Dry Ditalini Pasta (4oz)

    1 cup Spinach, Fresh

    Salt & Pepper to taste

    Instructions

    1. Heat Dutch Oven over medium heat, then coat bottom with cooking oil
    2. Add onions and cook couple of minutes til starting to turn translucent
    3. Toss in carrots, celery, and garlic. Cook for about 3 mins, til onions are slightly soft
    4. Stir in vegetable (or chicken) broth, kidney beans, diced tomatoes, and seasonings
    5. Bring to a boil and simmer on low for about 10 mins 
    6. Add pasta and cook an additional 10 mins, stirring frequently, or until pasta is cooked to your liking (aim for more al dente because noodles will continue to soften in the liquid)
    7. Add fresh spinach at the end of cooking; only needs to cook about a min
    8.  Give it one last stir and serve it up in bowls! Enjoy!

    Notes

    The broth isn’t exact because I usually cook the soup up with 6 cups but then add a cup or two towards the end just because I like more broth! Feel free to be your own chef!

    Did you make this recipe?

    Share a photo and tag us — we can’t wait to see what you’ve made!

  • Breakfast Casserole for Two

    Breakfast Casserole for Two

    This breakfast casserole for two is perfect for two people!

    Every time I look for recipes, I come across recipes that are designed for a 9×13-inch dish. While leftovers are great, it’s only my husband and I in the house, and that’s just too much food.

    As an Amazon Associate, I earn from qualifying purchases at no additional cost to you.

    Breakfast casserole for two

    Also, I have been trying really hard not to have waste at the end of the week due to the cost of groceries, and I could freeze some breakfast casserole, but honestly, that’s just not my style. I’d rather make a new one in a few weeks so it’s fresh.

    Ingredients

    • Tater Tots, or shredded hashbrowns
    • Pork Sausage, or whatever kind of crumbled breakfast sausage you like (my homemade pork ground sausage is perfect in this recipe)
    • Eggs, of course
    • Cheese, I used cheddar but feel free to change it up with Monterey Jack, Pepper Jack, Mozzarella, or anything else that sounds appealing to you
    • Spinach, I only recently started adding this into the sausage once it’s cooked before layering it up, but it’s some added veggies that you don’t even taste

    I know this list is short! It’s because this recipe is so darn easy!

    Of course, feel free to add extra veggies. If you do I would recommend sauteing them for a bit before adding them to the breakfast casserole so they are a little soft when it’s cooked.

    top of breakfast casserole

    How to Cook the Breakfast Casserole for Two

    Cook your breakfast sausage and add spinach at the end to wilt it down a bit and then set aside. It’s time to layer it up!

    Spray the bottom or wipe the bottom down with a little oil so nothing sticks.

    Layer of Tater tots on the bottom; fill that bottom up so it makes a platform for the meat and spinach.

    Add the meat and spinach on top of the tots. Whisk your 8 eggs in a bowl until they are smooth with a dash of salt and pepper. (See my tips for making The Best Scrambled Eggs here)

    Pour your scrambled egg mixture evenly over your Tator tots, sausage, and spinach mixture. Shred enough cheese to cover the top.

    Cover and bake your breakfast casserole for two in a preheated 375-degree oven for about 30 mins. Then uncover and cook for another 10 mins til the cheese is browned and beautiful on top.

    Breakfast casserole for two

    Other Things to Note

    Dish Size: This recipe is made using an 8×8-inch glass dish which means there won’t be a ton of leftovers. I always cut this little casserole into 4 squares. I eat 1, and my husband will eat 1 or 2. Which means there is always 1 or 2 pieces left over. This is SUCH a more manageable amount of leftovers than cooking a 9×13-inch for just the two of us.

    Anchor 8 inch baking dish
    My favorite baking dish from Amazon includes a lid for easy storage or travel.

    Serving: I always serve this breakfast casserole for two with a cup of coffee and some fruit! I’ve made this side dish with a person or two over for company and just cut up a bunch of fruit or made a side of pancakes or muffins, and it always works out.

    Taco Sauce: This dish is PERFECT coated in taco sauce! Our favorite taco sauce is by Herdez to put on top! And we don’t skimp on it, we always keep it on hand! Check it out here.

    Print

    Breakfast Casserole for Two

    5 from 1 review

    Wake up your taste buds and say goodbye to boring mornings with this ultra-satisfying breakfast casserole for two that’s bursting with flavor and guaranteed to fuel your day. Imagine layers of crispy golden tater tots nestled alongside juicy sausage crumbles, all smothered in a lusciously cheesy egg custard that bakes to fluffy perfection in just one hour. It’s comfort food made heavenly, perfect for a lazy weekend together or meal-prepped into baggies for a couple of days.

    • Author: Taylor Fuller

    Ingredients

    Scale
    • 2 Cups of Tator Tots
    • 1/2 lb Breakfast Sausage (Homemade Breakfast Sausage Recipe)
    • Handful of Fresh Spinach (about 1 1/2 cups)
    • 8 Eggs
    • 2 Cups Shredded Cheddar Cheese

    Instructions

    1. Preheat oven to 350 degrees
    2. Cook up breakfast sausage til cooked through.
    3. Turn down the heat and add spinach just til wilted. Then set aside.
    4. Coat the bottom of an 8×8-inch square cooking dish with oil.
    5. Layer Tator tots to cover the bottom of the dish.
    6. Next, layer the sausage and spinach mixture on top tots.
    7. Whisk all 8 eggs in a separate dish with a dash of salt and pepper (until smooth).
    8. Pour egg mixture over sausage, spinach, and tots.
    9. Place shredded cheese as the top layer.
    10. Cover loosely with foil and bake for 30 mins. Remove foil and bake for 10 more mins. (Disclaimer since all ovens are different: When checking to see if it’s done, you should be able to wiggle the dish a bit, and there should be no movement. The eggs should be set)
    11. Let cool for 10 mins, then enjoy!!

    We enjoy ours with a little taco sauce or salsa! Yum!

    Did you make this recipe?

    Share a photo and tag us — we can’t wait to see what you’ve made!

  • Easy Pesto Lasagna

    Easy Pesto Lasagna

    It has taken me WAY too long to post this recipe. This easy pesto lasagna is creamy, cheesy, and so darn easy.

    My mother gets full credit for this recipe she made when I was young; it quickly became one of her “known” meals. You know what I mean? Every time someone brings a dish somewhere, there is always that dish that people request..that was this dish of hers.

    Reasons this Pesto Lasagna is fantastic

    • Easy to prep the day before and leave in the fridge til you’re ready to pop it in the oven.
    • Great leftovers! These leftovers are perfect for lunch or dinner the next day.
    • The cheesy, ooey-gooey, warmness of this dish is the perfect comfort food.
    • Undeniably a crowd pleaser!

    Layer and Layers of Goodness

    How to make this beautifully layered dish:

    After the sauce is made and the meat is cooked..a decent layer of sauce at the bottom of the dish stops anything from sticking. Additionally, tilting the dish to coat the walls keeps everything from sticking on the sides.

    Second, ingredient down is some cooked turkey. Just a thin layer will do.

    food ingredients recipe cook
    Photo by Pixabay on Pexels.com

    The reason I suggest the no-boil noodle is ease! They are the easiest way to make lasagna and you really can’t taste a difference. I have even used to the Gluten Free ones (Buy here) and they are delicious! Anyways, open that box and lay down a full layer of noodles, completely cover the dish, breaking the last noodle to make everything fit without overlapping.

    Next is more sauce, since the noodles aren’t cooked it makes it easy to spread a nice thick layer of sauce over each noodle. (Keep in mind that because the noodles are no boil they will need to be surrounded in moisture to come to soften in the oven.)

    Another layer of turkey but save just a little for the top layer (about a handful)

    Then another modest layer cheese, finally the final layer of noodles, more sauce on top of those. FInally onto the last layer. Add the rest of the turkey, a generous layer of mozarella then top with a little freshly grated parm cheese and a sprinkle of garlic salt. The parm cheese and garlic salt are definetly optional but I highly recommend it as it adds a lot of depth to the dish.

    Print

    Easy Pesto Lasagna

    This lasagna can be done in under an hour or prepped the day before and just tossed in the oven when you’re ready. Enjoy this creamy, dreamy, and easy recipe!

    Dish 9×13

    • Author: Taylor Fuller
    • Prep Time: 25 mins
    • Cook Time: 35 mins
    • Total Time: 1 hour
    • Yield: 9 x 13 inch dish 1x

    Ingredients

    Scale
    • 1lb Ground Turkey
    • 2 Packets Knorr Creamy Pesto Sauce (Buy Here)
    • 3 1/2 cups Evaporated Milk (recommended but ok to change to preferred milk)
    • 2 tbsp Butter
    • 1lb Shredded Mozeralla
    • 9oz No-Boil Lasanga Noodles (Buy here)
    • 1/4 cup fresh Parmesan Cheese and pinch of Garlic salt (optional but recommended)

    Instructions

    1. Preheat oven to 350 Degrees
    2. Cook ground turkey on skillet til done, do not overcook.
    3. Prepare Pesto sauce as directed on package
      • Whisk evaporated milk, Knorr Creamy Pesto sauce packets and butter in sauce pan
      • Heat slow, whisking often til done (as directed on package)
    4. Layer Lasagna as follows: Bottom layer, cover bottom with thin layer of sauce, thin later of meat, noodles straight from package, cover the whole 13×9 pan, sauce on top of noodles, layer of meat, good layer of cheese, noodles, sauce, meat then cover the dish with nice thick layer of cheese to top it off.
    5. Sprinkle fresh grated parm and a pinch of garlic salt over top the dish
    6. Cover dish in foil and poke some holes in foil
    7. Bake in preheated oven at 350 for 25 mins. Remove foil and cook for another 10 mins til cheese is browning.
    8. Serve and enjoy!

    Did you make this recipe?

    Share a photo and tag us — we can’t wait to see what you’ve made!

  • Chicken Fried Rice

    Chicken Fried Rice

    This Chicken Fried Rice is filled with protein and vegetables making it perfect to enjoy as an impressive side dish or as a whole meal. It is nutritious and delicious!

    Why we love this Chicken fried rice

    Chicken fried rice is one of my favorite dishes. It has protein, veggies, carbs, and everything you need to make a full meal. I was used to buying this 1 specific packet of seasoning to make my fried rice, it was my tried and true. One day my grocery stores stopped carrying it, I couldn’t believe it, I couldn’t make my fried rice without it! That day I decided I would use the ingredients listed on the back of the packet to make my own. It was the first time I had done this; I was so proud of the results.

    This fried rice recipe is super kid-friendly, the onions are even diced really small, and it is just filled with delicious flavors that almost any palette will enjoy. This is a dish I have made when having company over and even when attending a potluck. It travels well and always gets completely eaten up.

    Picking Chicken for the fried rice

    Chicken thighs are my new favorite love. They are always juicy and so tender.

    Cooking with chicken breasts is easier when it comes to cutting them up in my opinion. If you are kind of picky like my husband and I, you stand there in the kitchen cutting all the ick off the chicken thigh before cutting it up. But…absolutely, 100% worth it.

    Chicken thighs have such superior flavor.

    Other Ingredients

    The rest of this recipe is pretty simple, substitute things as you see fit and make this your own!

    Rice: The pictures in this post were made with long-grain rice, but Jasmine Rice is my favorite kind of rice to make this recipe with as the fragrance gives it something special, and the granules just seem to hold together better.

    Eggs: The recommendation for eggs is always just ‘use high-quality eggs’ Homegrown eggs are by far the best, but if that is not an option, I suggest just purchasing some good ones from the store. The large yellow yolks add color and flavor to the dish.

    Speaking of eggs, learn how to make the best-scrambled eggs for breakfast right here!

    Soy Sauce: A great way to make this dish totally gluten-free is to substitute Soy Sauce for Coco Aminos. They have a similar taste, and the chicken fried rice quickly turns gluten-free!

    Ginger & Garlic: In this recipe, I stated powder for both of these. If you have the time, will, and energy, please feel free to add fresh instead! Fresh is ALWAYS better. My preference is to keep prepackaged minced ginger in the fridge; easy and fresher than powder.

    My favorite Wok for cooking this dish!

    Cooking Tips

    • Cook the chicken thoroughly, I like the edges to just start to get a little crispy.
    • Cold rice into the pan, oil, and heat til hot.
    • Scoot rice to the side and reduce heat a bit to add scrambled eggs (try not to burn the eggs).
    • Make sure your veggies are cooked to your liking before adding to your chicken fried rice.
    • Always take a chef’s taste test before serving, sometimes it needs a little extra soy sauce.
    Print

    Chicken Fried Rice

    This dish is great with a side of egg rolls or pot stickers, not that it needs it. A wok is the best pan to make this dish with but if you don’t own one a large non-stick pan or even a large non-stick pot works fine. Enjoy!

    • Author: Taylor Fuller
    • Prep Time: 20 mins
    • Cook Time: 15 mins
    • Total Time: 35 minutes
    • Yield: About 4 full meal servings 1x
    • Category: Family Dinners
    • Cuisine: Asian
    • Diet: Gluten Free

    Ingredients

    Scale

    1 lb Chicken Thighs, skinless & boneless

    3 cups Cooked Rice, cold

    1/2 cup Diced Onions, white or yellow

    2 Eggs, beaten

    1 cup Frozen Vegetables, cooked

    2 tbsp Soy Sauce or Coco Aminos

    1 1/2 tbsp Sesame Oil

    1 tbsp Garlic Powder

    1/4 tsp Ground Ginger

    1/2 tbsp Sugar

    1/2 tsp Black Pepper

    1/2 tsp Salt

    1/8 tsp Paprika

    4 tbsp Cooking Oil (I use Avacado oil)

    Instructions

    1. Cut chicken thighs into bit size pieces
    2. Heat oil in wok or large non-stick pan over medium heat. Cook chicken thighs for a few minutes and then add onions. Continue to cook til chicken is fully cooked and onions are soft. Then remove chicken and onions from pan and set aside.
    3. Heat 2 tbsp of oil in pan and add 3 cups of cold rice. Break up and saute for 3-4 mins.
    4. Add Soy Sauce, Sesame Oil and all seasonings (garlic, ginger, sugar, pepper, salt & paprika) and stir til coated evenly.
    5. Push rice to the side and add the beaten eggs, let cook then add to rice
    6. Add chicken and cooked veggies. Continue to cook for another min or 2 til everything is thoroughly heated. Enjoy!

    Notes

    • Chicken breasts would be fine for this recipe, the great thing about thighs is how juicy they are.
    • Rice should be cold, I usually make a batch of rice earlier in the day or the day before and just toss it in the fridge til it’s time to make dinner. If you don’t have time for this Minute Rice is a great alternative and just let it cool a bit before using, for some reason it works great.
    • Jasmine Rice is my favorite for this although Long Grain rice is totally fine
    • The frozen bag of veggies I usually buy for this is the peas, carrots and green beans, so yummy!

    Did you make this recipe?

    Share a photo and tag us — we can’t wait to see what you’ve made!