Category: Recipes

  • Homemade Cinnamon Rolls

    Homemade Cinnamon Rolls

    These will blow your socks off. No joke, these are the best homemade cinnamon rolls you’ve ever had. My excitement to share this recipe cannot be contained! Lets get started!

    Homemade Cinnamon Rolls

    Cinnamon Roll History

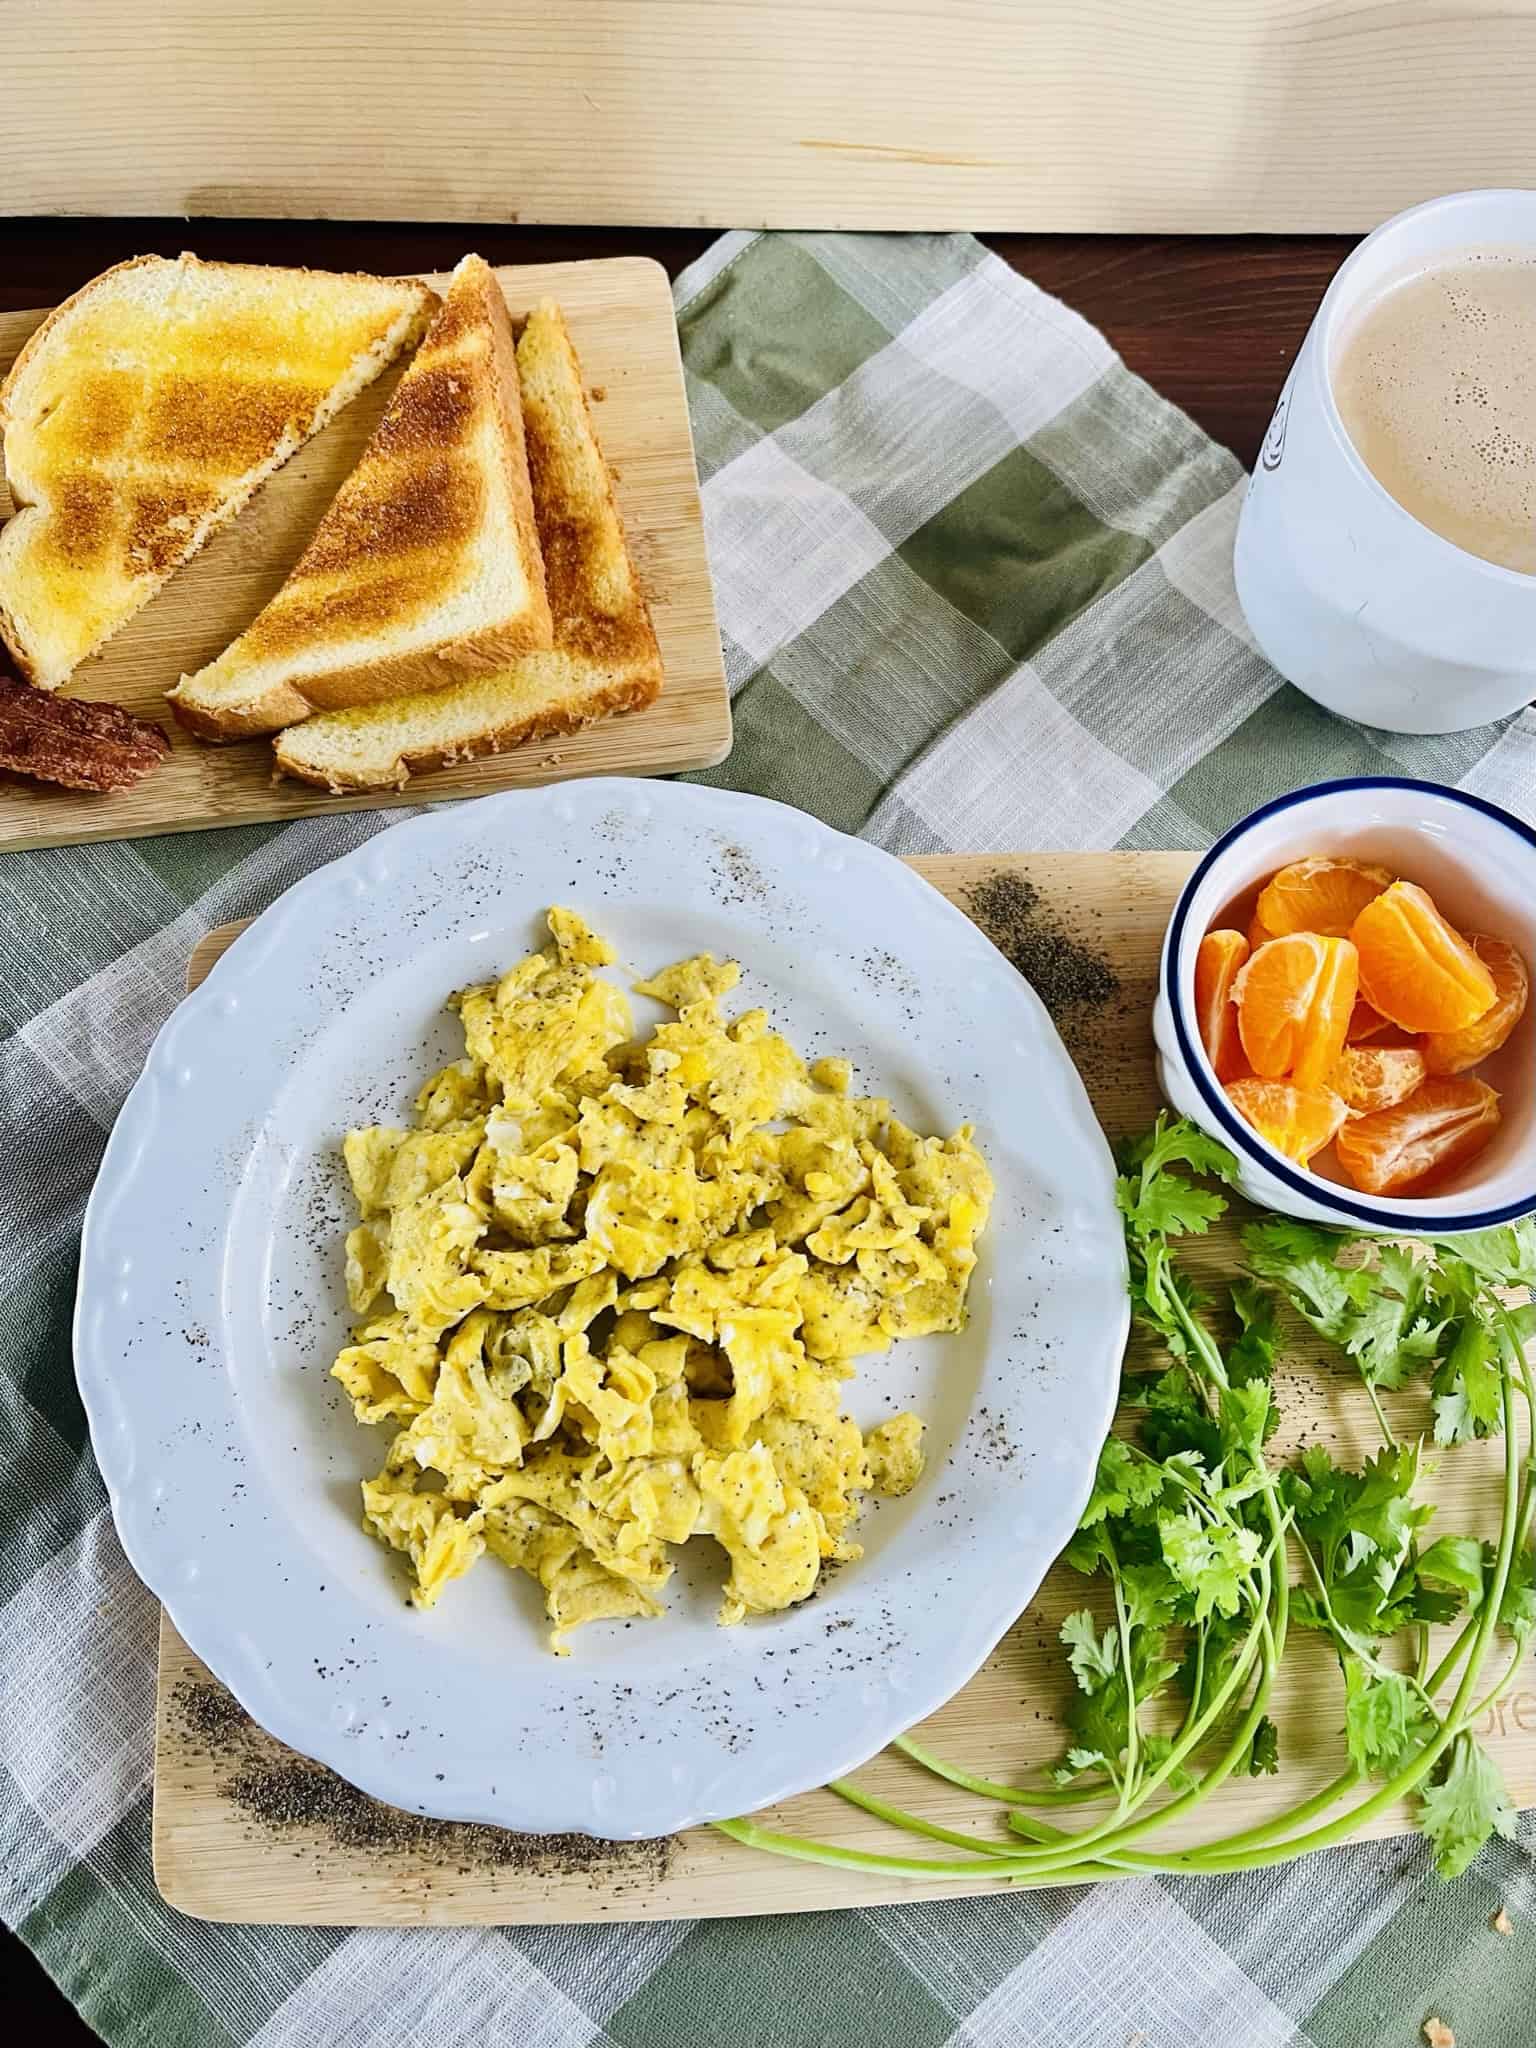
    Cinnamon rolls began in Sweden as a yeasty roll with cardamom embedded and sprinkled with coarse sugar on top. When cinnamon rolls were brought to America, the thick, ooey gooey frosting that we all love was introduced. At some point we decided this could be a breakfast OR a dessert. Hahaha… I could enjoy this dish for breakfast everyday of the week but it should probably be accompanied with some protein, such as bacon or The Best Scrambled Eggs.

    Bread Machine

    This spectacular dough is made in a bread machine. The bread machine turns this long process into a very passive way to make these. There is a lot of “do it and walk away” which is so convenient. If you don’t own a bread machine, I highly recommend considering picking one up!

    Using a bread machine to make dough for things like bread, biscuits, soft pretzels, dinner rolls or french bread loaves makes the machine a great investment.

    Cinnamon Roll Frosted

    Yeast

    Living yeast cells thrive in warm, moist and starchy environment. When these little cells are comfy and happy they thrive, poofing up to make a soft dough full of air pockets. Be careful with the tempurature of the ingredients due to the sensitivity of the yeast. If the milk is too hot it will kill the yeast and if not heated the cells won’t activate.

    For more info check out my article **Best Baking Tips.

    Homemade Dough

    The dough consists of all the usual suspects flour, sugar, eggs, butter and of course that special yeast. It’s the rising that’s important. The amount of time stated in the recipe for resting and rising is crucial.

    “Let rise in a warm place”

    – Every baker ever

    “Let rise in a warm place.” The common statement we always read in recipes involving yeast leavened dough. This statement always messed with my head. My refrigerator never seems warm on top. Is room temp warm enough? If I pre-heat the oven and set the dough on top will that be too hot?? These thoughts drove me crazy for years! So I did the research for both of us!

    Turns out the right “warm” temp is 75 – 78 degrees. If your fridge is warm that’s a great place, I elevate mine in the house a bit since heat rises. When it’s a little cooler in the house just let them sit a few extra minutes, they have always turned out perfect!

    This dough will be soft and malleable, not too sticky and not tough. I’ve worked with plenty of different dough in the past and this dough is just lovely to work with.

    Homemade Roll up

    Rolling & Baking the Rolls

    Once the dough is made it’s time to style these babies up! As shown in the picture above, roll out this dough to a large rectangle, about 16 inches by 21 inches and smother in the brown sugar/cinnamon mixture. Start rolling them up from the side that is 21 inches long.

    The long 21 inch roll of delight needs to be cut into 12 equal pieces. I’m sure you can see from my photo that all my pieces were uneven. If yours end up like mine…it’s fine. They all cook thru just fine haha!

    Place these babies about 1-2 inches apart on a greased 9 inch by 13 inch dish and let them rest another 30 mins in a warm place. When done cooking they should be slightly browned on the edges.

    Cinnamon Rolls Smothered

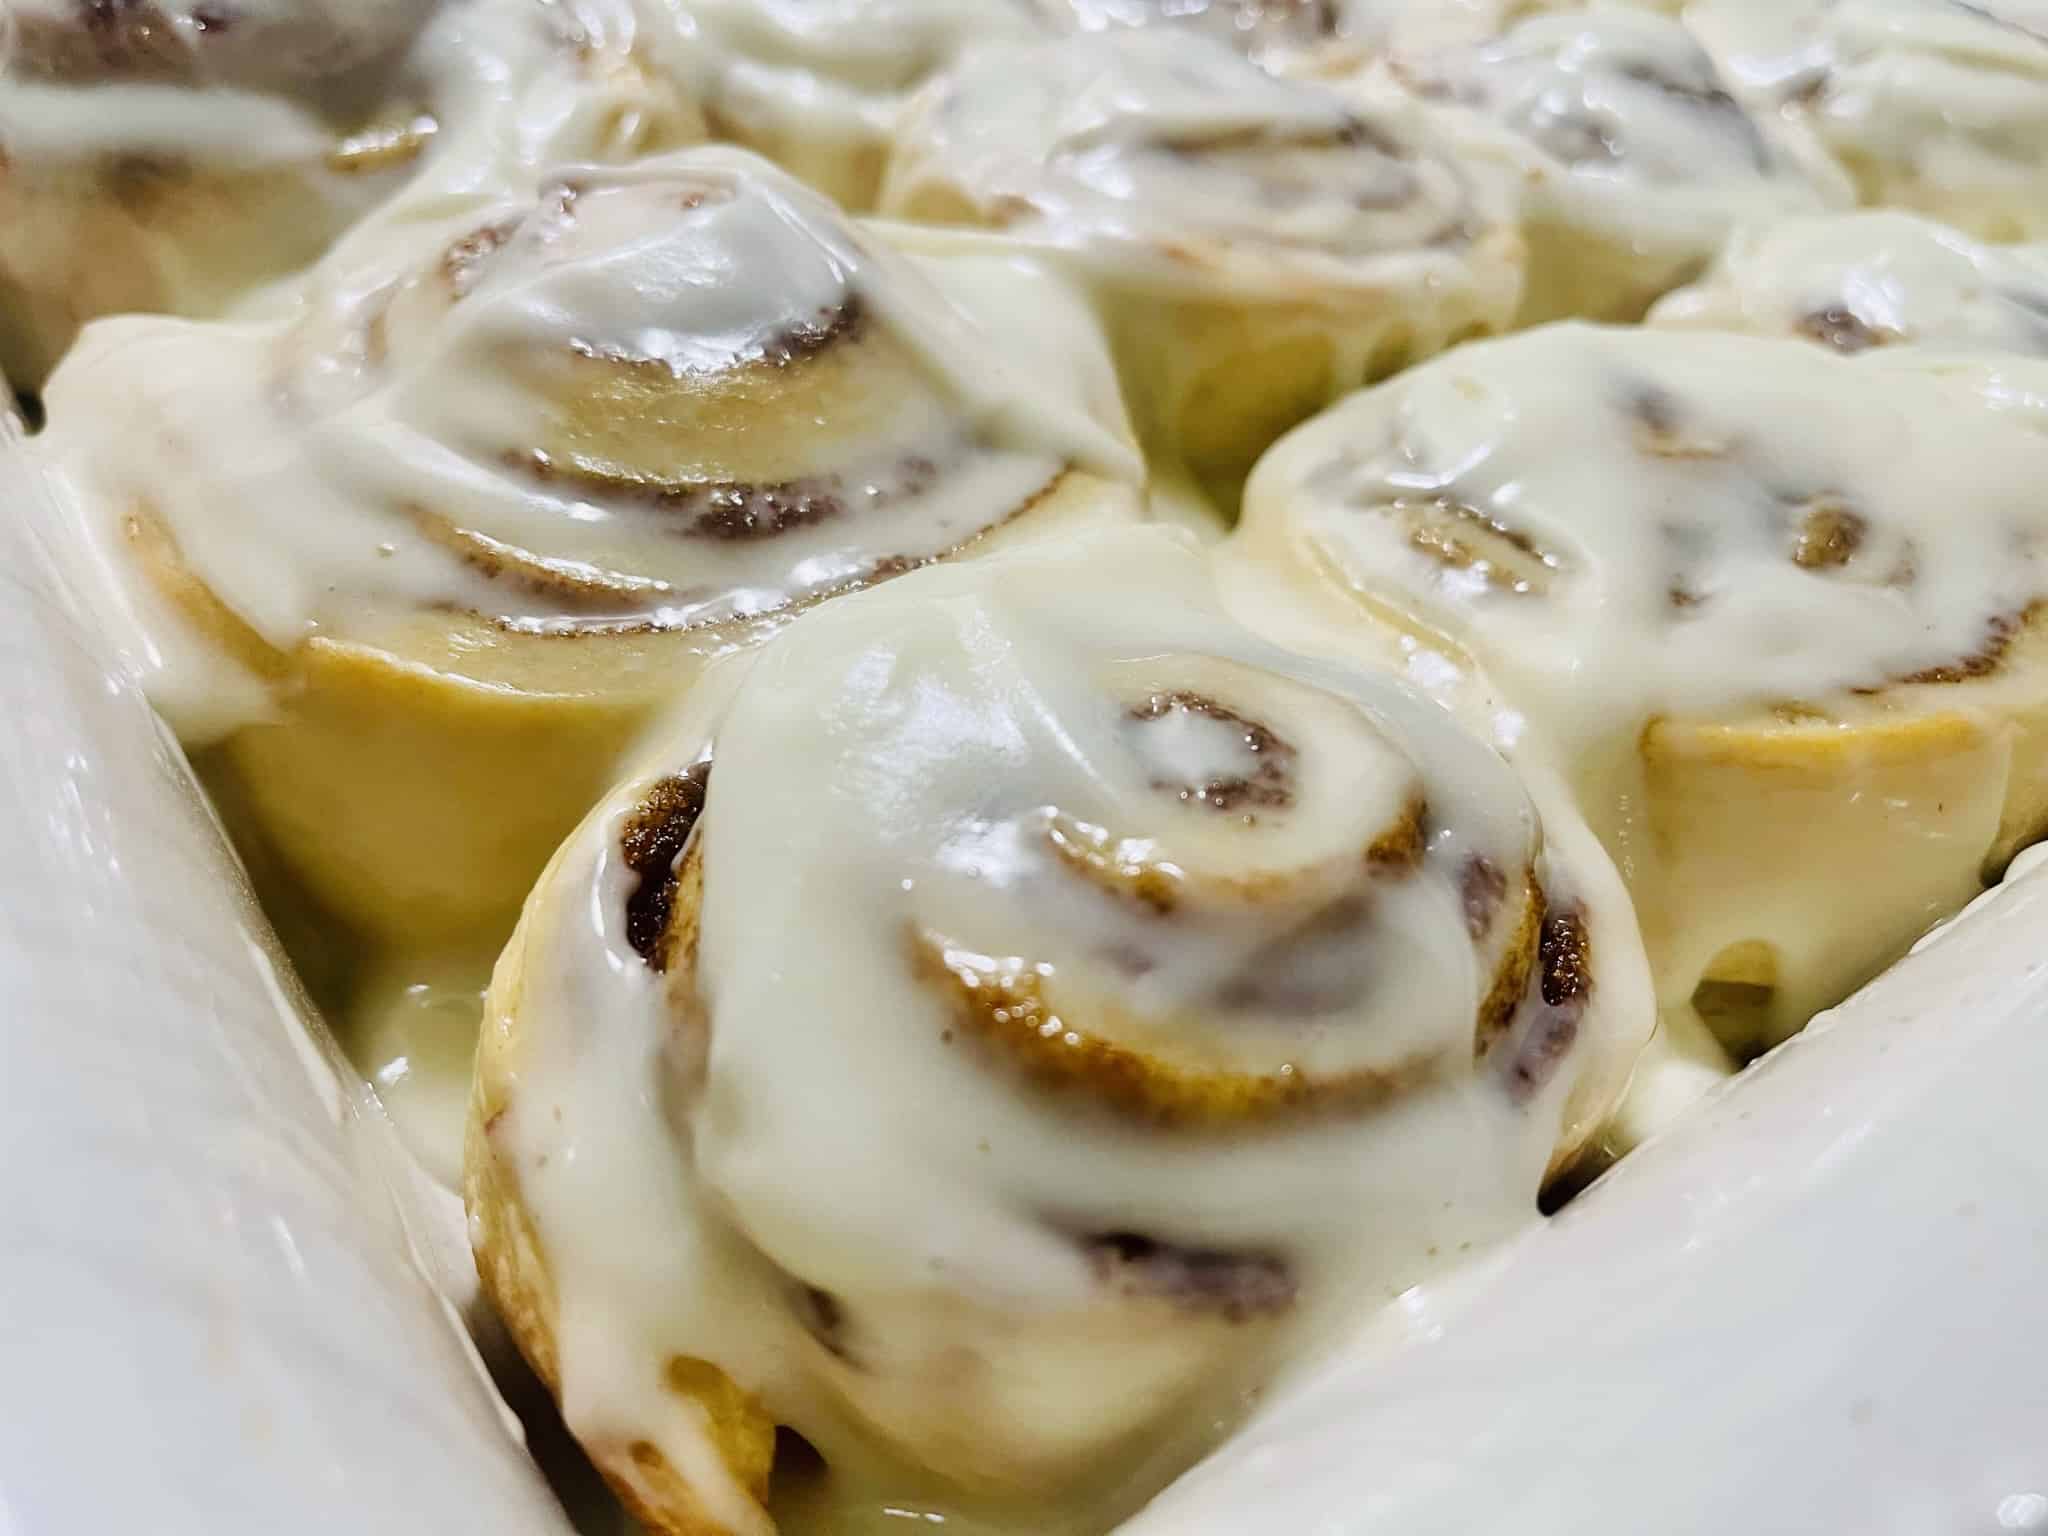
    Let them cool for a 5 to 10 mins so all your frosting doesn’t melt away. Then smother in this delicious cream cheese frosting, the recipe makes a really decent amount of frosting to allow them all to be thick in the goodness. Now enjoy your Homemade Cinnamon Rolls!

    Print

    Homemade Cinnamon Rolls

    These Homemade Cinnamon Rolls will knock your socks off. Enjoy these for dessert or for a sweet breakfast. They are worth every minute spent it takes to make these. 

    • Author: Taylor Fuller

    Ingredients

    Scale

    Dough:

    1 cup Milk, warm (110115 degrees)

    2 Eggs, room temp

    1/3 cup salted Butter, melted

    4 1/2 cups Bread Flour

    1/2 Sugar

    2 1/2 tsp Bread Machine Yeast

    Filling:

    1 cup Brown Sugar, packed

    3 tbsp Ground Cinnamon

    1/2 cup Butter, softened

    Icing:

    2 cups Powder Sugar

    1/3 Butter, softened

    4 oz Cream Cheese, softened

    1/2 tsp Vanilla

    Instructions

    1. Place all dough ingredients into bread maker in order; milk, eggs, melted butter, flour, sugar. Then create divot in dry ingredients and drop yeast into divot. Turn on bread maker to “dough”
    2. Once bread maker is done turn out dough onto light floured surface. Cover with towel and let rest in warm place for about 10 mins.
    3. Prepare filling in medium bowl by mixing brown sugar, cinnamon & butter. Set aside.
    4. Roll dough out into 16 inch x 21 inch rectangle.
    5. Spread filling onto rectangle as evenly as possible.
    6. Starting at the longest side, roll dough.
    7. Cut dough into 12 pieces.
    8. Grease 9 inch x 13 inch dish and place all 12 pieces evenly in dish, cover and let double in size (30 mins)
    9. Preheat oven 400 degrees then bake rolls for 15 mins til edges are lightly brown 
    10. Mix icing ingredients together until humongous and spread onto rolls while still warm. 

    Did you make this recipe?

    Share a photo and tag us — we can’t wait to see what you’ve made!

  • How to Make the Best Scrambled Eggs

    How to Make the Best Scrambled Eggs

    We all know the difference between bad, good and great scrambled eggs. This article hold all the secrets to make the kind of scrambled eggs you can eat with nothing else, the kind of eggs you want a whole plate of. Simple, delicious scrambled eggs.

    Scrambled egg breakfast plate

    Whether you’re trying to eat light and healthy or feeding the whole family for breakfast knowing how to make the best scrambled eggs is important. Also, it’s easier than you may think! So many recipes over the last decade advise to add this, add that, do this, do that but the perfection of eggs comes from simplicity.

    So, are you ready to learn how to make the best scrambled eggs? Lets get started!

    1: Buy Quality Eggs

    This is probably a very obvious tip but quality of the eggs make a huge difference. A quality egg will be deep yellow, large yolk. Lesser quality eggs will be have yolk that is pale in color and the yolk will be smaller. (Home grown chickens lay a noticeably better egg than anything available to buy in the grocery store but no need to fret, just buy a quality brand of cage free eggs.)

    Fresh Egg

    2: Do Not Add Anything

    You heard me. No milk, no cream, no cheese, no pepper, no meat. The only things that should be mixed together is egg, salt & pepper. So many recipes swear by “add milk, makes it so fluffy.” You don’t need anything to make your eggs fluffy, just leave it out.

    3: Beat the heck Outta Them

    Eggs should be beaten to a smooth liquid for good consistency and even cooking. Break the eggs into a bowl, add salt & pepper then just whip it, whip it good.

    Breakfast scrambled egg plate

    4: Use a Non-Stick Pan

    When the eggs get any kind of stuck to the bottom of the pan that is definitely not how to make the best scrambled eggs. Using a clean, smooth surfaced, non-stick pan is the best way to achieve no flaky edges or burned pieces of egg.

    Scrambled eggs

    5: Use Butter

    Butter is what makes these eggs. Recently I made scrambled eggs with a little olive oil…it is not the same. AT ALL. Use butter if you are trying to make the very best scrambled eggs. No need to use a whole tablespoon but use enough to put a thin coating on the bottom of the pan, you want those eggs to come up cleanly without sticking.

    6: Heat Low…but Not Too Low

    On a scale 1-10 heat the eggs on a 2 1/2.

    Heat the eggs too low and they won’t pull together. They will also ruin the lovely little layer of butter on the bottom of the pan. Heat the eggs too high and they will brown and burn on the bottoms. Even if you can save them from burning they will cook too fast to develop their flavor and will be too hot causing them to dry out. (More on the drying out later)

    7: Continuously Build Egg Mountain

    Once the eggs look like they are starting to form a layer on the bottom use your WOODEN utensil to PULL each side of the bottom layer towards the middle. Continue to pull more eggs up and on top as thou you are trying to make egg mountain in your pan, then break up, then rebuild. Keep your eggs together. We are trying to keep moisture in the eggs.

    Scrambled egg fold
    Melt enough butter to cover the whole bottom nicely. Add well beaten egg when pan is heated.
    breakfast fold
    Once you see the bottom starting to form a layer you can begin to build Egg Mountain. Continue to pull inward and upward.

    8: Do Not Overcook

    Seriously. This is very very important. The eggs should be cooked but moist. If there are spots of brown anywhere they are overcooked. You want the eggs to look fluffy with spots of shine.

    Bonus Tip: Cover them for extra fluffiness

    If ultimate fluff is what you need you can stick a lid over top of the eggs just before they are done and turn the heat down to minimum for a couple of mins. I usually do this if I’m making breakfast sandwiches and want a little extra fluff. While fluffy is nice I do not believe it helps flavor at all and to be honest this is not my favorite way, I feel leaving them in the pan increases the risk of burning.

    9: Let Them Cool

    Cooling another important step to take these from great to the best! Just like a good steak or Thanksgiving turkey; eggs need a min to rest. When they cool, the flavor of the salt and pepper really come out and add to the flavor of the eggs.

    breakfast plate

    10: Enjoy!

    Now that you have all the tips on how to make the best scrambled eggs it’s time to get cooking! My husband and I have always had eggs where people add milk, cheese, making scrambles with meat and veggies. Since learning the right way to make eggs we truly enjoy what I refer to as “Simple Scrambled Eggs” they are delish and I hope you enjoy.

    If you make these please leave a comment!

  • Homemade Breakfast Sausage

    Homemade Breakfast Sausage

    This savory, sweet, and hearty Homemade Breakfast Sausage is great for any breakfast! With a combination of pork, sage, and maple syrup, this pork sausage is delicious. It’s a perfect recipe to turn into patties and also for breakfast sandwiches.

    This ground version is great for a breakfast bake, made into breakfast burritos, breakfast bowls, or even breakfast quesadillas.

    As an Amazon Associate I earn from qualifying purchases.

    Homemade Breakfast Sausage

    Why make Homemade Breakfast Sausage?

    This recipe came about from my husband. Every time I would attempt to bring home some pre-made sausage he wouldn’t be able to stand the gristle and little hard pieces that always seem to be found in packaged pork.

    Although frustration would hit me after making a whole meal he was no longer interested in eating, I also understood not wanting to eat meat with little pieces of ick in it. Hence, trying to branch out and try something new!

    ..branch out and try something new!

    Plain ground sausage available in your local grocery store’s meat department is amazing. it’s smooth and ground to perfection! No more gristle! No more weird little icky hard pieces ruining a meal!

    Add all your own seasonings and BAM! Homemade Breakfast Sausage! Plus, being able to tell the family or your guests, “It’s made with homemade sausage,” always feels really good!

    Homemade Breakfast Sausage Ingredients

    Ingredients

    • Ground Pork
    • Thyme
    • Parsley
    • Oregano
    • Rubbed Sage
    • Paprika
    • Salt & Pepper
    • Maple Syrup

    The list of ingredients might seem long, but I am willing to bet you have most of these items in your pantry. I didn’t always keep Thyme, Oregano, and Parsley around. Now that I do, it has opened a whole new world of flavors and recipes!

    You’ll notice I used freeze-dried herbs; if you are using ground herbs, just reduce the amount a little bit. Same with the rubbed sage, it’s a little fluffier than ground, so if using ground, just be light-handed with it.

    If these are things you don’t normally have around, pick them up. I bet they will open you up to adding a little to dishes you never knew needed it!

    All the ingredients can be adjusted to your liking. There have been times when I left out the Maple Syrup just due to the dish I was preparing.

    Make this recipe your own, and have fun with it!

    Instructions for Homemade Pork Sausage

    This recipe is super simple! Just mix all the ingredients in a bowl and then cook! Also don’t skimp on the maple syrup, it adds a moisture to the sausage that makes it so much better!

    Amazon Sensarte pan
    The frying pan sitting in my Amazon cart! Just in case you’re in need of a new one, it has great reviews and isn’t crazy overpriced!

    The only tip I have to share about this easy recipe is to dirty that extra bowl to mix together before cooking.

    I know so many of us chefs are tempted to just toss the meat into a pan and season on top, then mix in the pan to save the dish. I have done this recipe both ways many times, and it is very worth it to mix before cooking. It helps the flavors meld together for this homemade breakfast sausage.

    Print

    Homemade Breakfast Sausage

    This Homemade Breakfast Sausage is so easy and delicious, this savory dish is full of seasonings and a dash of maple syrup to give it that sweetness that goes along with any breakfast meal. Feel free to turn this recipe into patties for Breakfast Burgers! Just make sure to cook on low heat, this process really does help all the flavors cook into the pork.

    • Author: Taylor Fuller

    Ingredients

    Scale
    • 1 lb Ground Pork
    • 1 tbsp Thyme
    • 1 tsp Parsley
    • 1 tsp Rubbed Sage
    • 1 1/2 tsp Oregano
    • 1 tsp Black Pepper
    • 1 tsp Salt
    • 1 tsp Italian Seasoning
    • Spinkle of Paprika
    • 2 tbsp Maple Syrup

    Instructions

    1. Place Ground Pork in bowl big enough to mix
    2. Combine all ingredients with raw pork
    3. Heat medium sized skillet on medium/low heat
    4. Cook pork, breaking meat into small pieces while cooking
    5. Cook until pork is done, about 15 mins
    6. Enjoy!

    Did you make this recipe?

    Share a photo and tag us — we can’t wait to see what you’ve made!

  • Chile Relleno Souffle

    Chile Relleno Souffle

    A piece of this Chile Relleno Souffle will impress any person luckily enough to snag it before it’s gone!

    This unique recipe is a masterpiece brought into my life by my wonderful mother-in-law. It was the dish she always made for someone’s birthday or a special evening.

    This dish pairs best with some beans, Spanish Rice, a side salad or some Elote. I am so excited to share this recipe with you.

    Chile Relleno

    What is Souffle?

    A souffle is made with a creamy base, usually made with cream or cheese and topped with a fluffy and puffy egg white mixture that has been beaten to stiff peaks.

    The souffle came from France in the 18th century. It can be sweet or savory. This Chile Relleno Souffle is savory and creamy with a delicious puffy egg topping.

    Souffle topping

    Importance of Cheese

    This dish contains fresh Cheddar and Monterey Jack, these two cheeses create such a perfect pair with the chiles. Of course feel free to experiment with different cheeses.

    The only thing I must insist on is using fresh cheese, not pre-sliced. Pre-cut cheese doesn’t melt as well and usually contains other ingredients. Slice your own, and you won’t regret it.

    You’ll want to slice your 2 lbs of cheese into about 1-inch squares. Try to make all the pieces the same size, it makes assembly so much easier. (I’m terrible about that and pieces are always wonky sizes haha!)

    Cheese and peppers

    Pepper prep

    The Chile Relleno Souffle also calls for Fire Roasted Whole Green Chiles, the “Fire Roasted” adds such great flavor.

    This is the can I purchase. I always buy 2 and use most of them. Click to purchase.

    When prepping these for the recipe, open both cans, turn the sink on, and slice them down on one side with your finger, exposing the middle. Give them a little rinse and remove any seeds, then lay them flat on paper towels or a clean kitchen towel.

    Other Ingredients for Chili Relleno Souffle

    A few eggs, separated so we can stiffen the whites and blend in a couple tablespoons of flour.

    Then we’ll take yolks and whip them with a little evaporated milk.

    We’ll also need one can of tomato sauce to drizzle on top. Delicious!

    Chile Relleno souffle layers

    Layers of Chile Relleno

    The layers of cheese and peppers are what make this Chile Relleno. Traditionally, Chile Relleno is a pepper stuffed with cheese, sometimes fried covered in batter, and always tossed into a tomato sauce. We’re gonna layer peppers with cheese and top with swirls of tomato sauce *chefs kiss*.

    Once you cut your 2 blocks of cheese into squares (hopefully keeping them uniform the same size) it’s time to layer! The layer of peppers goes on the bottom and idk about you, but I like a nice FULL layer of peppers for good flavor. Don’t worry; these peppers aren’t spicy.

    After your first layer of peppers, it’s time to checkerboard your cheese! I added this picture above so you can see how I put it together. Keep going til you have 3 layers of peppers and cheese!

    chile relleno souffle

    Souffle Topping

    For the fancy souffle topping, you’ll separate your eggs.

    3 egg yolks into 1 bowl and 3 egg whites into another bowl.

    The egg whites need to be blended (if you don’t own a hand blender just whip it, whip it good) until they form nice stiff peaks. Once the peaks are holding stiff, you can add your 2 tablespoons of flour and just blend til mixed.

    In the bowl with the egg yolks, just blend til smooth, then slowly add your can of evaporated milk and blend til light and fluffy.

    souffle mix

    Once you have both bowls mixed, you can slowly add your egg yolk mixture into your egg white mixture til fully mixed, try not to overmix.

    Chilli Relleno

    Print

    Chili Relleno Souffle

    This cheesy, melty, savory souffle is perfect for any taste buds, kids and adults alike. While the prep can take some time I promise it is all worth it. This dish is great for a family night with a side or beans and spanish rice

    • Author: Taylor Fuller
    • Prep Time: 45 mins
    • Cook Time: 1 hour
    • Total Time: 1 hour 45 minutes
    • Yield: 12 pieces 1x
    • Category: Family Dinners
    • Cuisine: Mexican
    • Diet: Vegetarian

    Ingredients

    Scale

    1lb block Sharp Cheddar Cheese

    1lb block Monterey Jack Cheese

    2 cans of 27oz Whole Green Chiles

    3 whole Eggs

    2 tbsp All Purpose Flour

    5 oz or 2/3 cup Evaporated Milk

    15 oz (1 can) Tomato Sauce

    Instructions

    1. To prep the peppers, lay out some paper towels or a clean (non-fuzzy) kitchen towel. Under a running sink slice down the side of the pepper to open it and give it a quick rinse to get rid of the seeds then lay flat to dry.
    2. Slice cheese into 1-inch squares about 1/4-inch thick. Each block should make about 50 squares. Do your best to make them all around the same size. Then set aside.
    3. Preheat oven to 350 Degrees
    4. Now it’s time to construct our dish! First, 1 layer of peppers laying flat followed by a checkerboard of the 2 cheese flavors. Repeat to make 3 layers of each, ending on a top layer of cheese. Set aside.
    5. Souffle topping time!
      • Separate your egg white and egg yolks. Blend your egg whites til you have stiff peaks.
      • Then add the 2 tablespoons of flour and blend. Set aside.
      • To egg yolks, in separate bowl, slowly blend in 1 can of Evaporated milk and beat til lightly fluffy and well mixed.
      • Slowly add egg yolk mixture to egg white mixture until smooth. Do not over mix.
    6. Pour and spread egg mixture on top of pepper and cheese dish, spread to cover whole top.
    7. Slowly pour tomato sauce in circular motion over-top the egg mixture (I like to put mine in a zip-lock and cut a small corner to pour for even circle design)
    8. Bake uncovered for 1 hour (60 mins)
    9. Allow to cool for 10-15 mins to prevent soupy-ness
    10. Enjoy!!

    Notes

    Pouring the tomatoes..if your don’t want to use a plastic bag you can puncture 1 small hole and 1 slightly larger hole on opposite sides of the top of the can for easy drizzle..otherwise just put into a mixing bowl with an easy pour spout.

    The cool time is very important or it will all be soupy and not hold together properly.

    Did you make this recipe?

    Share a photo and tag us — we can’t wait to see what you’ve made!

  • Easy Spanish Rice – 4 Ingredients

    Easy Spanish Rice – 4 Ingredients

    This kid friendly, simple, Easy Spanish Rice recipe is sure to satisfy everyone! This rice doesn’t require cutting onions or garlic or peppers it is SO EASY. It’s the kind of side you can just toss together and have ready in 25 mins. This easy Spanish rice will be enjoyed by all because it is so simple yet so full of flavor!

    Dish with spanish rice

    Spanish Rice Vs. Mexican Rice

    Alright…so maybe you clicked on this recipe and thought…’this is Mexican rice.’ After a lot of research..I think you’re right. BUT my mother, who created this simple recipe, changed an Easy Spanish Rice recipe into this easier recipe so I’m calling it Spanish! haha..Here’s the difference if you’re curious!

    Spanish RiceMexican Rice
    Doesn’t fluff/ClumpierMedium Grain
    Long GrainSofter
    Made with SaffronFluffier

    Meal Ideas

    This Easy Spanish Rice goes well with anything but my top recommendations are Tacos, Easy Homemade Chicken Enchiladas – 6 Ingredients, chicken burritos, chili relleno souffle, or Tostadas. Something I really love is a good bean & cheese burrito with Spanish rice! MMM! The great thing about this recipe is it is very kid friendly because there isn’t a bunch of stuff in it so maybe just this rice with a little side of chicken for the kiddos! Leftovers heated with a little cheddar cheese and black pepper on top are always sure to make for a great snack! Whatever you do with it, it’ll taste great.

    Meal with spanish rice

    Cooking tips

    Ingredients: The butter and oil is totally interchangeable! Use whatever you have on hand, the rice tastes great either way. Any brand of Garlic Salt or Tomato sauce is great also. I have also used Jasmine Rice in place of the usual long grain rice, it was delicious. Just use what you have on hand.

    Spanish Rice Ingredients

    Cooking Utensil: I have always used a sauce pan for this recipe. Last time I made this in front of my mother-in-law she said “you’re not gonna use a pan?” The dumbfounded look on my face was probably pretty funny! This is just the way I have always done it and you know..don’t fix what ain’t broke!

    browned rice

    Heat: Once your sauce pan is hot add your oil/butter. Once your oil/butter is hot add your rice. Let the rice brown for a bit, your rice will be start to smell good and pieces will turn brown. When it looks like the photo above you’re about ready to add the water, garlic salt and tomatoes. Once those ingredients are added just put a lid on and walk away. I’m telling you…this is SUCH Easy Spanish Rice! YUM!

    Print

    Easy Spanish Rice – 4 Ingredients

    This Easy Spanish Rice is great for kids and adults alike! This simple 4 ingredient recipe is GREAT to help feed a crowd! Even though it is simple it is still so very delicious. All you need

    • Author: Taylor Fuller
    • Prep Time: 5 mins
    • Cook Time: 25 mins
    • Total Time: 30 minutes
    • Yield: about 46 side dish servings 1x
    • Category: Easy Side Dishes
    • Cuisine: Mexican
    • Diet: Gluten Free

    Ingredients

    Scale
    • 1 cup White Rice
    • 2 tbsp Butter or Cooking Oil (I used avocado oil this time)
    • 1 tbsp Garlic Salt
    • 4 oz (1/2 cup) Tomato Sauce
    • 2 cups Water

    Instructions

    1. Heat medium sized sauce pan over medium heat. Add oil and heat til shinny and hot.
    2. Add Rice and heat til browning.
    3. When grains of rice are browning add water, garlic salt & tomato sauce . stir well and cover.
    4. Boil on low for 20 mins (don’t lift lid)
    5. Enjoy the smell of the cooking rice, delicious.
    6. Once done give it a quick fluff and enjoy!

    Notes

    • Use whatever white rice you have, Jasmine rice is SO good in this recipe!
    • Both butter or oil is great in this recipe!
    • Top with a little black pepper and cheddar cheese for extra spectacular flavor!

    Did you make this recipe?

    Share a photo and tag us — we can’t wait to see what you’ve made!

  • Easy Chicken Enchiladas – 6 Ingredients

    Easy Chicken Enchiladas – 6 Ingredients

    These easy chicken enchiladas are a show-stopper! This meal will make a great family dinner or just dinner with some amazing leftovers! Switch out the chicken for beef, add onions or fresh garlic, and adjust cheeses to your liking; this recipe is so versatile!

    easy chicken enchiladas

    These easy chicken enchiladas are tried and true.

    This recipe has been there for me since I moved out on my own at 18. Every time we were having company, this was my go-to recipe, along with my Easy Spanish Rice and some good ol’ pinto beans. It is so easy, but people can’t eat it without the “ooo”‘s and the “ahhh”‘s.

    Make sure to try these with this Easy Spanish Rice as a side dish next to these Easy Chicken Enchiladas that only consist of 4 simple ingredients!

    Alternatively, this Chile Relleno Souffle is delicious for something a little different. Layers of peppers and cheese topped with a fluffy souffle topping.

    Protein

    I wanna share my not-so-secret secret with you…get a Costco rotisserie chicken (or from anywhere else, but lets face it, Costco’s is the best). They are delicious, and it makes this recipe that much easier.

    I usually try to shred my chicken the day before and put it in a container in the fridge. Feel free to buy pre-shredded chicken or roast up some. Of course you can also change out chicken for ground beef or pork, or even some shredded beef would be delicious!

    Maybe you’re not a big meat eater..just toss some veggies in place of the meat. Whatever your palette desires, or whatever you have in your fridge, will be just fine in these easy chicken enchiladas!

    cheesy dinner

    Flour or Corn?

    So..lets talk tortillas..traditional enchiladas are made with corn tortillas. I have made this recipe with corn tortillas, probably more than I have made it with flour.

    The reason I went with flour for this recipe is just personal preference; they are softer and have a more..buttery texture. Delicious. Feel free to do what you want.

    Also, side note, if using corn tortillas, I would recommend frying them in a bit of oil just til they start to cook, quickly remove them, then proceed as directed.

    …they are softer and have a more..buttery texture.

    Mexican meal

    Cheese

    Any cheese will do! I went with simple cheddar for the sake of making it easy, and it tastes great with just that.

    A mix of cheeses will always take it up a notch thou. If I had had some Monterey Jack on hand, I would have used that also in these chicken enchiladas.

    The only suggestion I really have about cheese is..if you can..shred it yourself. Shredding it yourself allows the cheese to melt so much nicer and gives these easy chicken enchiladas such a fresh taste. In a pinch, of course, you can use pre-shredded but I have to highly recommend taking the extra time to freshly shred it.

    Chicken enchilada dinner
    Don’t forget all the fixin’s!

    Can I add…to these enchiladas?

    The answer to the end of this question is yes. Add it! If you like onions, bell peppers, or garlic, throw them in a pan to saute a bit and add it to your protein.

    If you want to add some veggies, do it! If you’re trying to sneak some veggies in, zucchini is a really good one cause it’s so flavorless.

    Also, feel free to omit the Diced Green Chilies if that’s not your thing. The beauty of these easy chicken enchiladas is how they can be tailored to fit almost all taste buds!

    The Ingredients:

    ingredients
    Cheddar cheese, Enchilada sauce, Diced green chilies, black olives, chicken and tortillas. So simple!

    Need more dinner inspo?? Check out these other dinner recipes!

    Spinach and Mushroom Noodles with Chicken

    Dutch Oven Minestrone Soup

    Easy Pesto Lasagna

    Chicken Fried Rice

    Print

    Easy Chicken Enchiladas – 6 Simple Ingredients

    These easy chicken enchiladas will impress anyone you’re making it for! While it is full of flavor it is not full of tons of ingredients. This recipe will make 12 full sized flour enchiladas, you will need TWO 9×13 dishes. Are you ready to make an easy and delicious dish?? Lets get started!

    • Author: Taylor Fuller
    • Prep Time: 45 mins
    • Cook Time: 45
    • Total Time: 1 hour 30 minutes
    • Yield: 12 Enchiladas 1x
    • Category: Easy Meals
    • Cuisine: Mexican

    Ingredients

    Scale
    • 1lb Shredded chicken breast (about 2 breasts)
    • 12 Flour tortillas
    • 1 28oz can Red Enchilada (I use La Victoria)
    • 1 4oz can Diced Green Chiles 
    • 45 cups of shredded Cheddar Cheese
    • 1 6oz can Whole Black Olives chopped or 3.8oz can sliced Black Olives

    Instructions

    1. Preheat oven to 350 degrees.
    2. Make sure all of your ingredients are prepped. Chicken is shredded. Cheese is grated.
    3. Warm tortillas in pan on stove top just a bit. They should be warmed but not crispy.
    4. Now the fun part..time to assemble. Start by putting a thin but well covered layer of sauce at the bottom of BOTH of your 9×13 dishes.
    5. For each tortilla we will want to have a coating of sauce on it. I usually just toss each tortilla in the saucy mess in the dish, cover the tortilla then make my enchilada.
    6. Put a small amount of chicken…maybe 1/4 cup of chicken, 1-2 tablespoons of cheese and a teaspoon of diced chilis into a sauce soaked tortilla. (Don’t overstuff)
    7. Roll that up and repeat. You should be able to make 12 evenly portioned enchiladas, 6 in each dish. With plenty of cheese leftover.
    8. Once they are all done cover them with any remaining sauce and all the remaining cheese. Then top these beauties with the whole can of olives.
    9. With any leftover sauce pour it along the edges as the sauce is what keeps them from sticking to the pan so you want them to be nice and moist.
    10. Cover and bake for 25 mins. Remove cover and bake for an additional 20 mins to get that golden brown cheese on top.

    Notes

    These portions all work perfectly for me but I do like to keep an extra can of sauce on hand and some extra cheese just in case I’m a little heavy handed on the cheese while rolling them up.

    These should end with a decent amount of sauce at the bottom and on the sides because there isn’t anything worse than spending time making a beautiful dish and then it all burns on the bottom.

    Did you make this recipe?

    Share a photo and tag us — we can’t wait to see what you’ve made!